1

 My K75 Xcountry Wed Jul 22, 2015 12:01 am
Gaz

Life time member

Hi all! I have started to compile a thread on the journey I have been on for the last 2-3 years personalising a K75. It may take me a few sessions to get it down hence the Chapter 1 description.
The thought bubble for this project started way back in February 2012 when I was on the return leg of my 3,000km round trip to Phillip Island for the Australian round of the World Superbike series. I was riding my R80G/S Paris Dakar at the time, daydreaming (as you do on a long trip) about how much I loved this bike but also how good my K1100LT was for touring.
By the time I had completed the two day trip home I had a picture in my head of a K75 modified into an all road tourer influenced heavily by the style of my R80G/S. At the time I had never even sat on a K75 and had only ever seen a couple of them in the 15 years that I had owned my K1100.
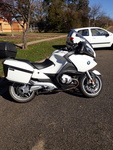
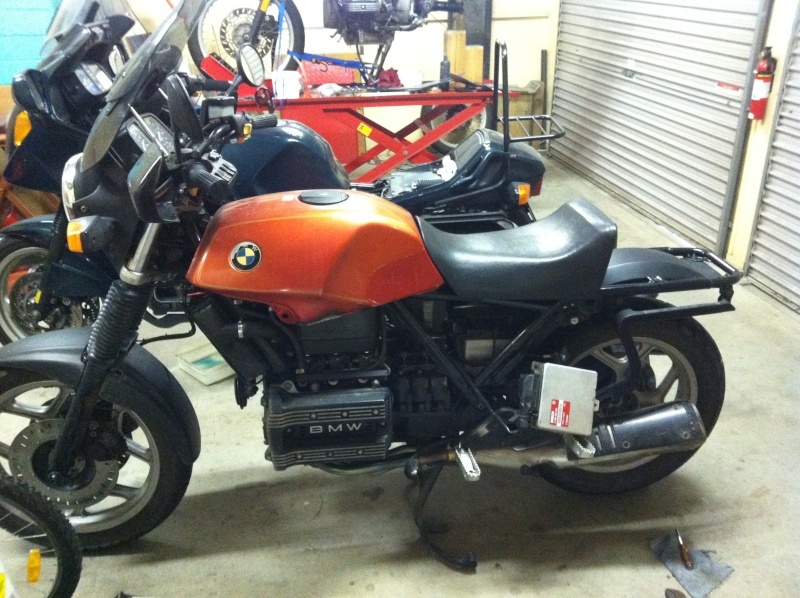
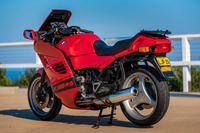
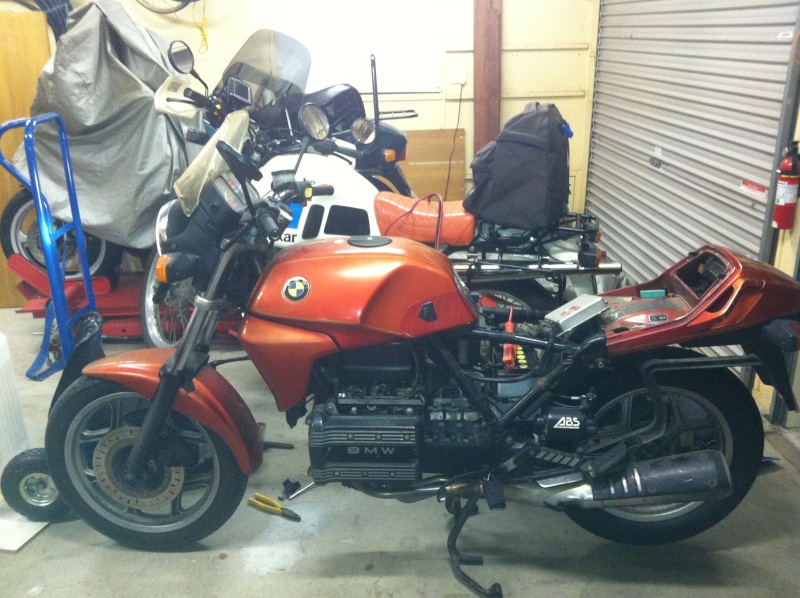
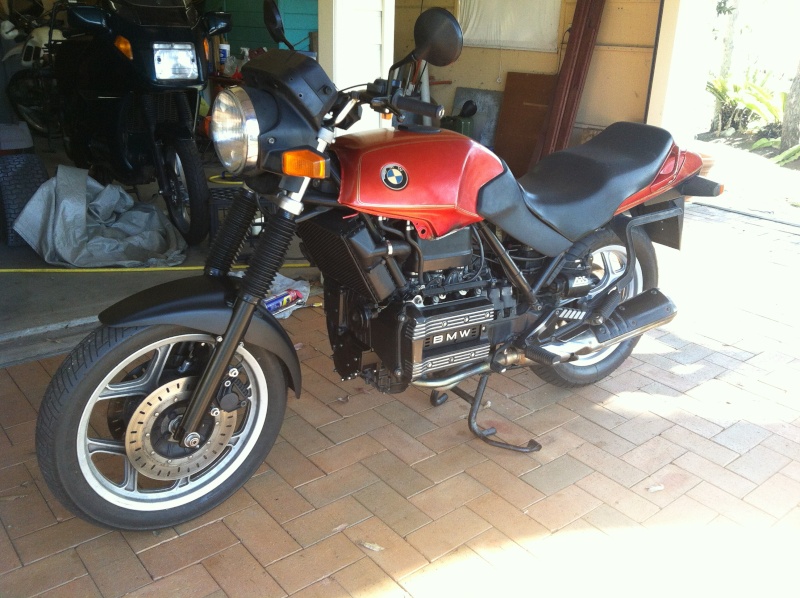
So the search began …..... I looked at a few for sale but they were S models in very good condition and consequently far too expensive for what I had in mind. At the end of May 2012 I found what I was looking for in the back corner of a bike wrecker's warehouse in Sydney – a 1990 K75 (naked model with low seat and rear disk) with 77,447km showing on the odometer for $800.00. Apparently it hadn't run for the 3 years or so that it had been there but no parts were missing. Deal done, loaded onto the trailer and home it goes.
An initial walk around indicated that the fork seals were shot with most of the fork oil having soaked the brakes, broken mirrors, a few small cracks in the seat vinyl, badly faded paint – even though it looked orange the paint code said it was red, not too bad really if it will run.
Drained the old fuel from the tank and added some fresh stuff, changed oil and filter, new coolant and purchased a new battery – lets see what happens.
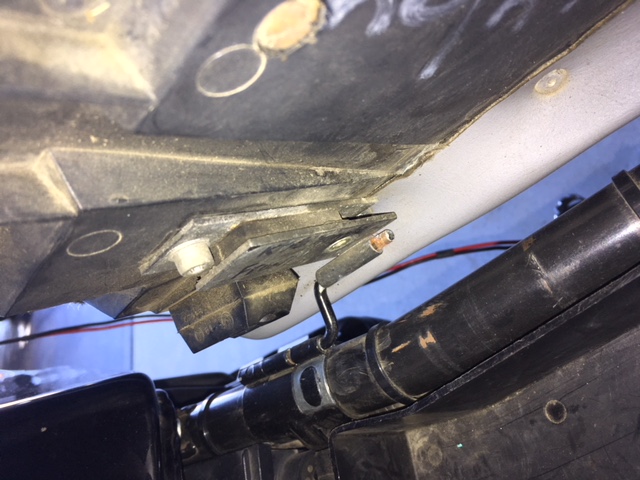
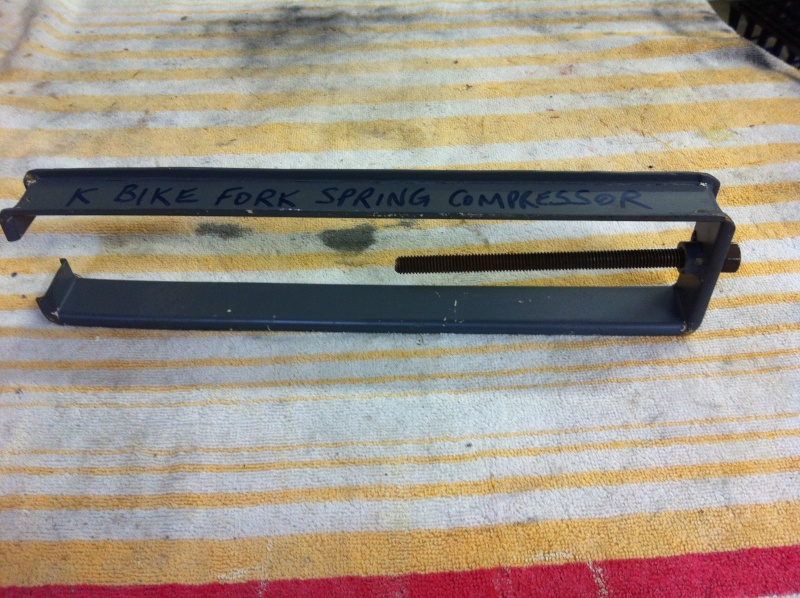
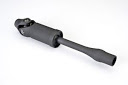
Good, she runs so lets get the forks off and clean up the front brakes. It took quite an effort to get the caps off the tubes as someone's previous effort at working on the forks had resulted in the top edge of the tubes being belted with some sort of punch which burred the inner edges over preventing the caps from coming out. I made up a small clamp like a bearing puller to hold the caps down against the springs so I could grind off the burrs and let the caps come out.
Next challenge was to get the fork tubes out of the triple clamps which again took quite a bit of time and patience combined with a fair bit of swearing. Once out new seals were fitted, a helicoil insert put in for the stripped drain plug on the left side, the sliders repainted and a pair of gaiters fitted, then slide them back in. These are the S type forks made by Brembo so I used 280 ml of 5 wt oil as recommended by TWB.
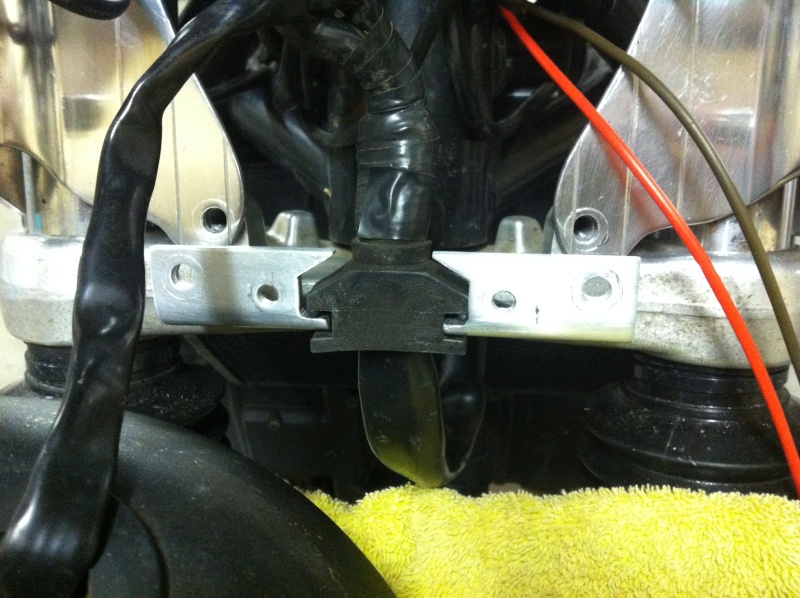
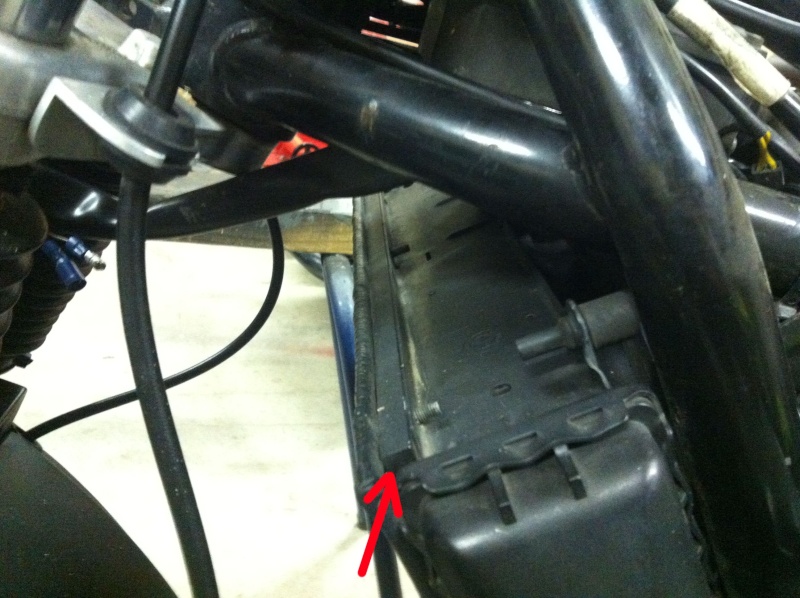
Since I was not going to use the radiator shroud I took it off and removed the radiator for a good clean as it had collected a fair bit of the leaking fork oil and was now full of oily dust. A check of the fan revealed the melted brush holder syndrome so I ordered a new motor from EME and fitted it. Before refitting the radiator to the bike I made up a stone guard using the mesh from the original shroud secured to adapter strips of aluminium that I mounted to the top and bottom of the radiator frame (arrowed in photo).

Cleaned up all of the front brake components ready for refitting. While the front guard was off I decided that it needed to be matt black to fit with the picture of the bike in my head so painted it before refitting.
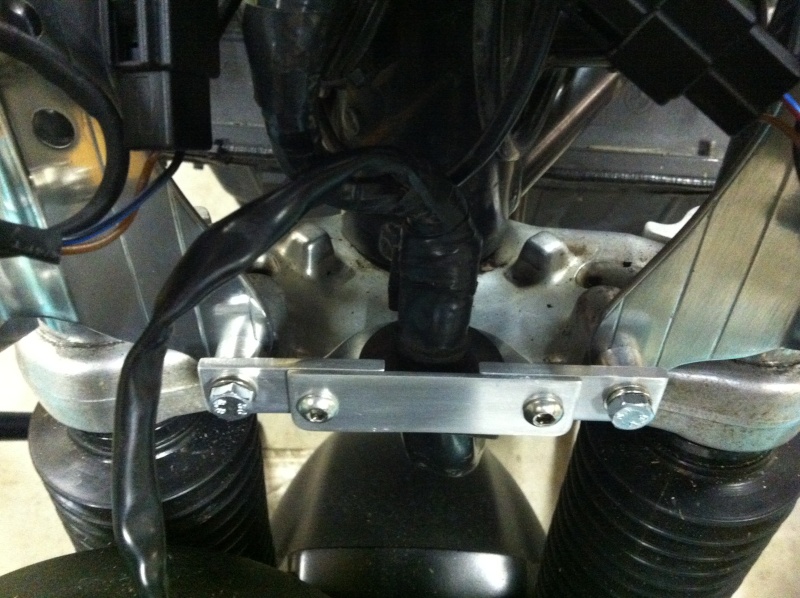
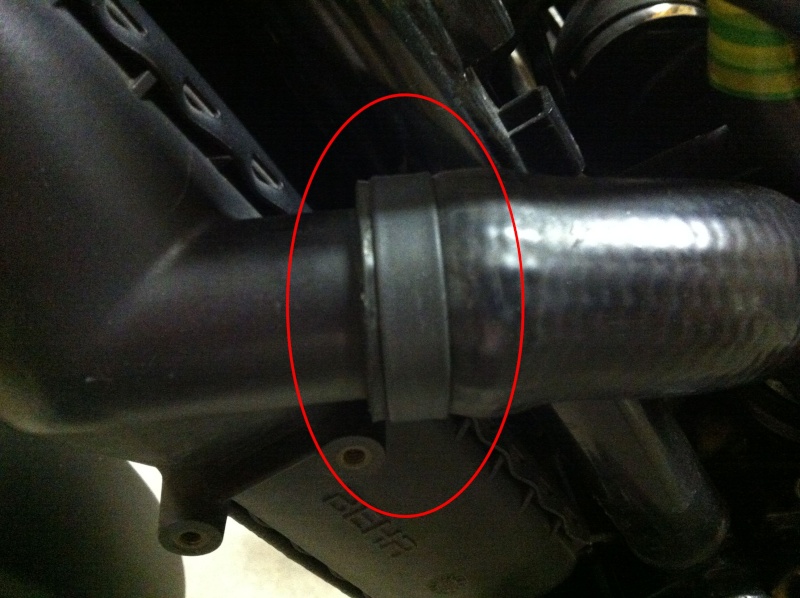
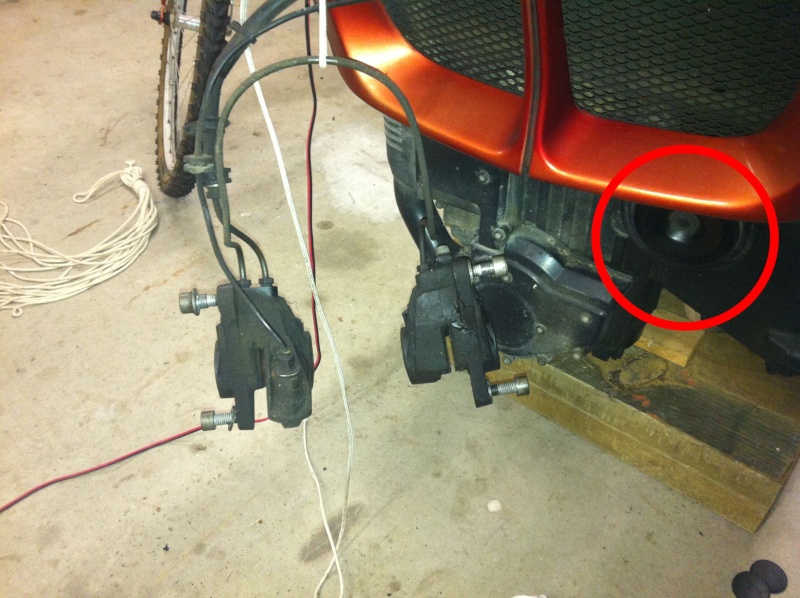
The standard location on this model for the horn has it hanging from a bracket just below the bottom of the radiator (circled in the photo) right where it will get hammered by stones while travelling on gravel roads, which I hope to do a bit of with this toy. To improve the situation I used my well worked method of walking around and around the bike with measuring devices in hand testing every space that I could find to fit the horn. If I am relocating or fabricating any components for the bike I always try to utilise any existing holes/bolts etc. so that I do not drill, cut or weld onto the original frame; that way it can always be put back to standard by myself or a future owner if required. So the horn ended up living behind the radiator on the right hand side mounted on a little custom made bracket bolted to the frame at the front gusset.

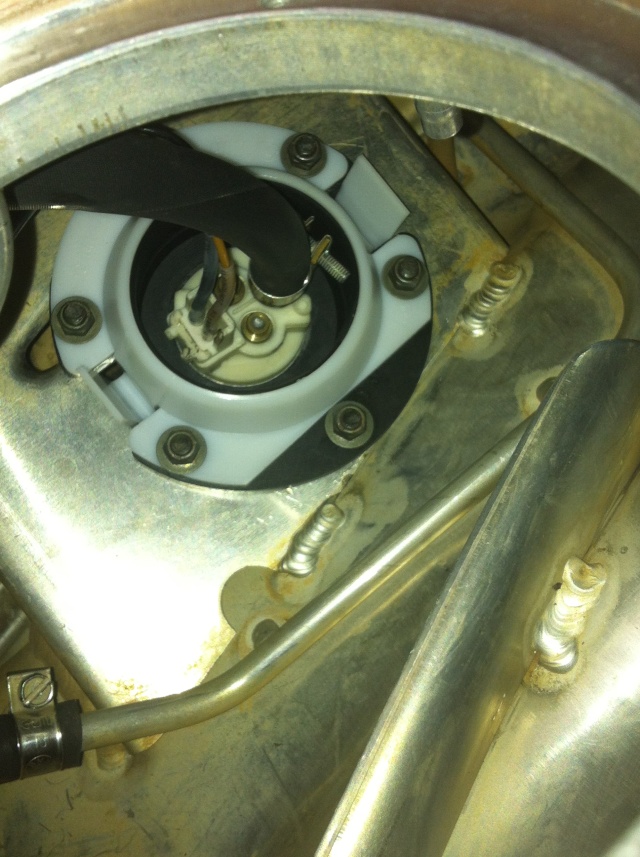
Time to have a proper look into the tank – what do we find? A non standard fuel pump, type is a Delphi 6443224, hanging loosely in the plastic mounting collar secured by a cable tie.


Checked the pump dimensions and ordered a spacer sleeve, rubber skirt and plastic collar from EME and fitted up using worm clamps and remade the soldered connections onto the pump (has now been happily purring away for 17,000km).


Noticed that the tank had the usual weep from corrosion at the lowest point on each side.
So I took it to a guy in Sydney who had done some weld repairs on my R80G/S tank. He welded and pressure tested the tank so that should be it for the foreseeable future.


Once the tank and radiator were refitted the bike was run up to temperature to ensure the fan was coming on as required – it did, so cross off another couple of jobs.
Since I had now run the engine a few times naturally the water pump started to leak from the telltale hole, so order a rebuild kit and read up on the dreaded water pump overhaul procedure. The pump was removed and cleaned up (took much longer to do than to say), seals replaced and the pump repainted then refitted. I was not that confident when it was test run but all was well.


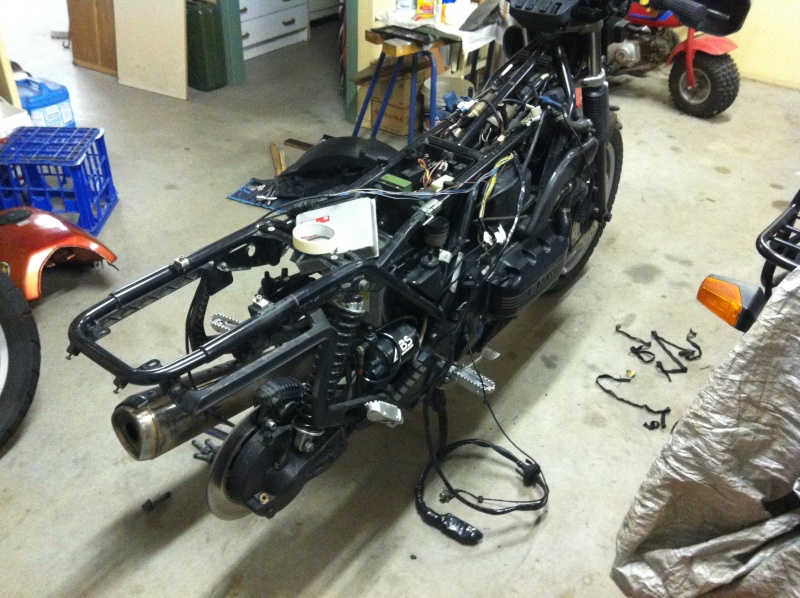
For this project I didn't want to initially spend a lot of money on a high quality shock until I had an idea of how much I would use this bike since I have two others in the shed but the original shock shaft looked as if it was scored. I sent it to RAD Shocky repairs in Brisbane who overhauled it and re-chromed the shaft for $240 which will do me for now.
While I had the rear shock off I was cleaning up around the rear end and noticed the cable to the speedo sensor had been crushed. The outer sheath was split open and one of the cores was cut through to the copper. I wasn't sure how sensitive the speedo electronics were to the impedance of the sensor circuit and whether a solder repair would affect it but decided to give it a go as water would get in and corrode it as it was – worst case is a new sensor. Happily the repair worked fine.


Now seemed the right time to check the condition of the drive shaft splines – not that happy with these.

After much agonising I decided to install a new aftermarket design drive shaft (and yes, I am aware of the mechanical issues of mating new and slightly worn splines) made by the Emerald Island company in Taiwan and sold in Australia by Munich Motorcycles. It was half the price of a BMW shaft. I liked some of the design features such as the blind cavity at the final drive end which means that the grease cannot migrate up the hollow shaft, grease-able and replaceable uni and replaceable cush rubbers. These are photos off their web site.

The big drawback is that you have to remove the swingarm to fit the shaft as the diameter across the uni is a fraction too large to slide in from the rear. There are some posts on the internet of people taking some material out with a grinder (from memory it was no more than a couple of millimetres) to allow the shaft to be slid in from the rear but that didn't sit well with me so I took the long way (hey - I had not had the swing arm out before). Gearbox output splines were good so re-lube both ends of drive shaft and reassemble. Still need to get into the gearbox input splines for a clean and lube.
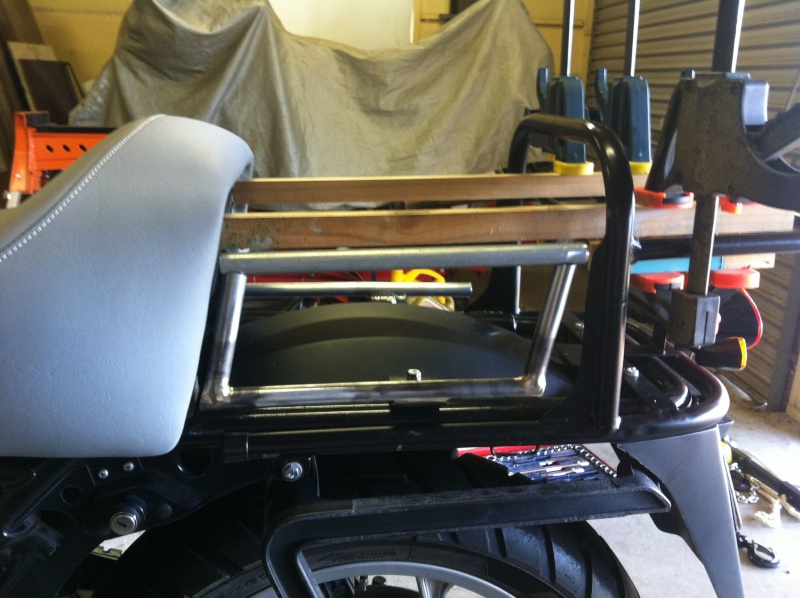
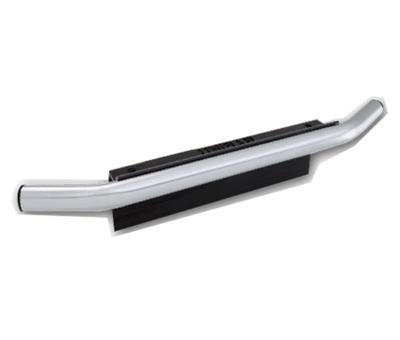
The picture in my head always included the removal of the ducktail and replacement with a retro style short rack over the tail light with the bike being able to be fitted with either a dual seat or a single seat with intermediate rack. I have the ability to do this on my R80G/S having both the factory dual seat and single seat with rack.
The sequence of achieving this needed to be;
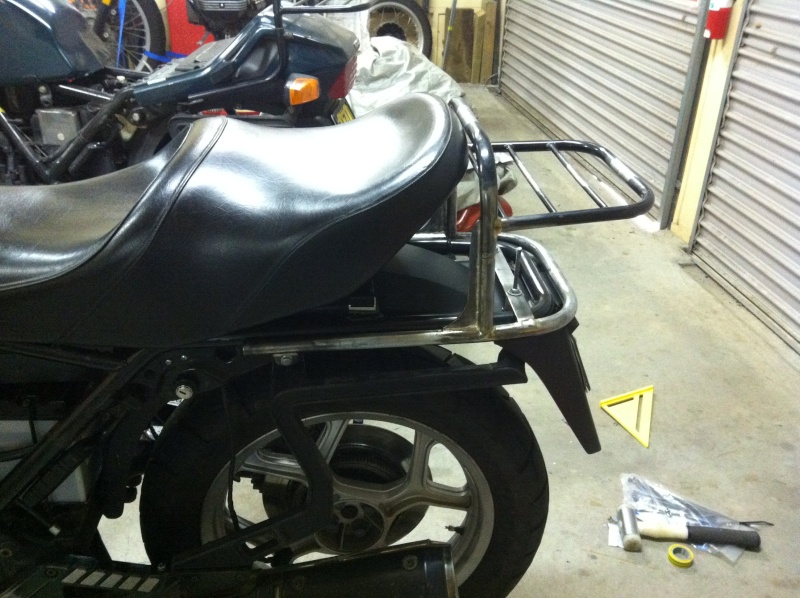
Fit the dual seat,
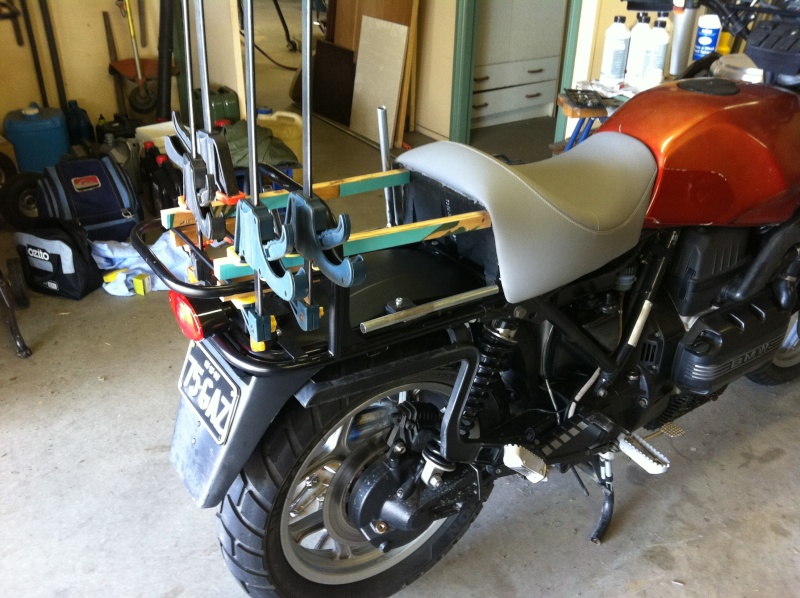
Remove the ducktail and fabricate the rear rack and tail light arrangement to align with the dual seat,
Have a single seat made up and fitted to the bike,
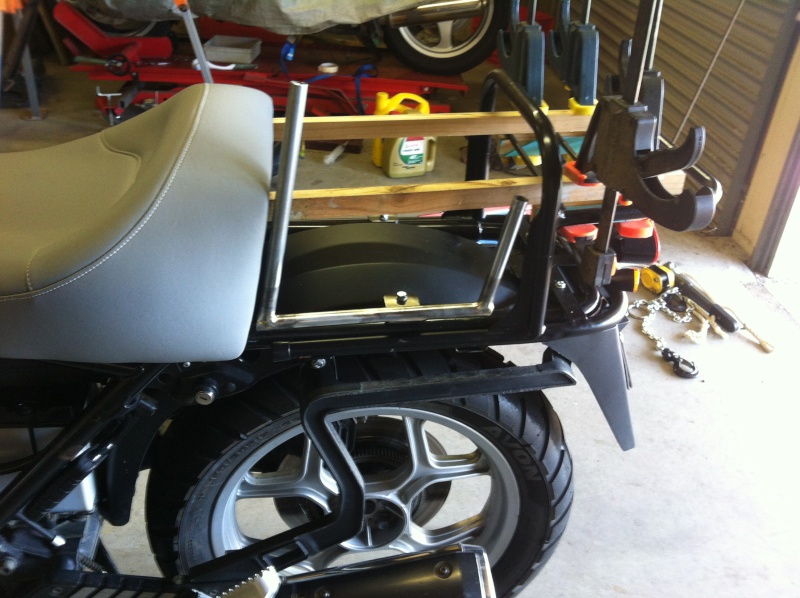
Fabricate the intermediate rack section to fit with the single seat.
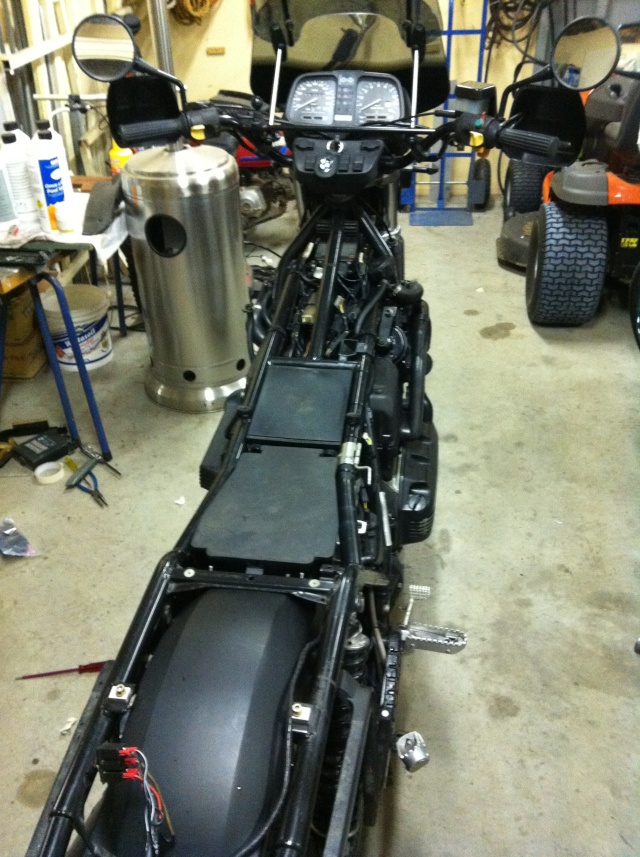
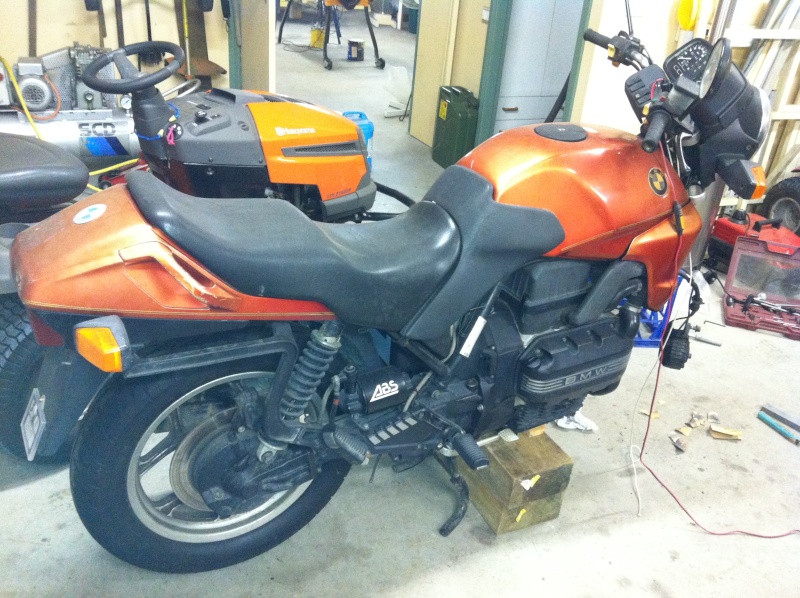
The first step along this path was to remove the factory low seat on the K75 as it was too low for me and fit the BMW dual comfort seat from my K1100LT (I figured I could only ride one at a time so if dual seat was required it was only a few minutes work to change it over). All I had to do was fabricate the bracket for the rear seat hinge using the one from the K1100 as a pattern. Of course I didn't think of just buying a second hand one or in fact just bringing the bracket off the K1100 when I changed the seat over, but hey it was a good little fabrication exercise. I also obtained a second hand standard seat height toolbox/EFI control mount section with splash guard (this bike will not have side covers) and seat lock mechanism.
We are now up to January 2014 (it was a slow process finding the time for the project while having to fit work in) and it's time to get it registered and get some riding done. New mirrors were fitted and the necessary inspections completed with a few minor hassles due to the fact that this bike was imported into Australia privately and last registration (expired 3 years earlier) was not in New South Wales. Anyhow, licence plates on and away we go.

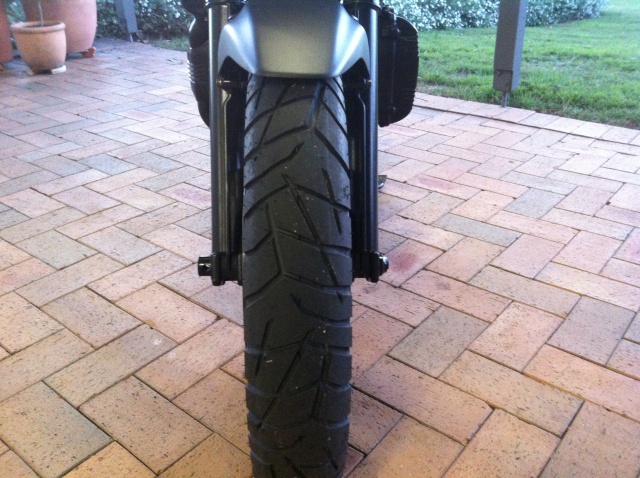
Now that it was on the road with tyres that had heaps of tread and were heaps of years old it was time to mount some new tyres. I had spent many hours on the internet reading tyre reports and checking available sizes as I intended to fit dual sport tyres if possible and eventually decided on a set of Pirelli Scorpion Trails. These are certainly not hard core dual sport being rated as 90/10 road/dirt but they were the only one that I could find with 100/90 x 18 (original size) front tyres. I chose a 140/80 x 17 for the rear as there is no 130/90 x 17 in that range. Interestingly Pirelli make them as a conventional front and radial rear. I found them to be very good for me particularly in the wet on sealed roads and probably a bit better than street tyres on gravel roads.

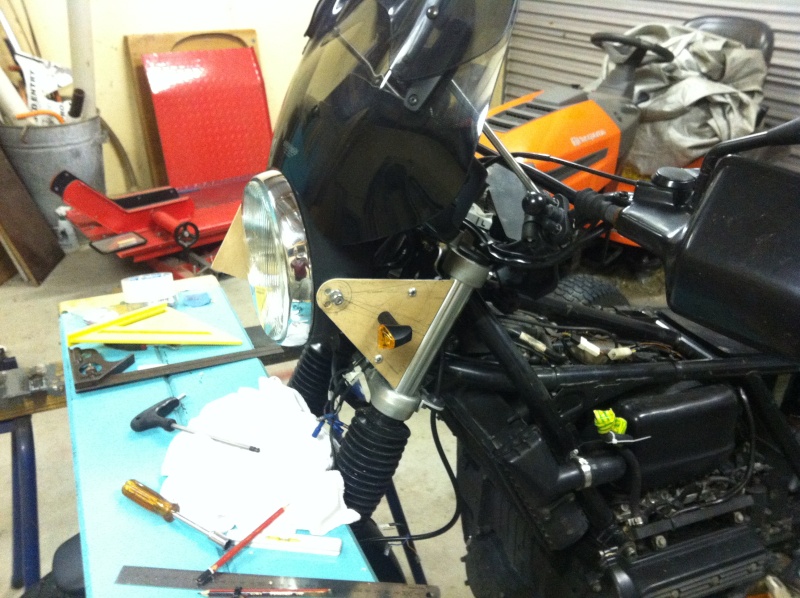
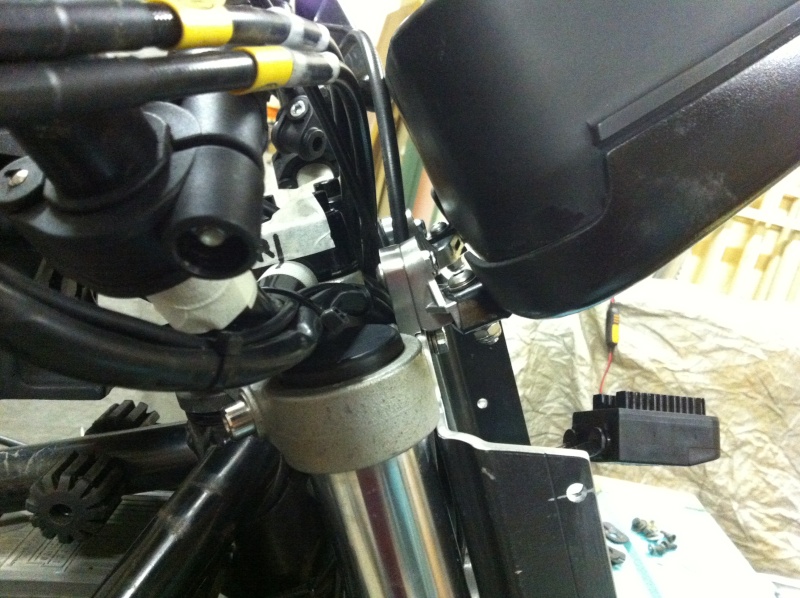
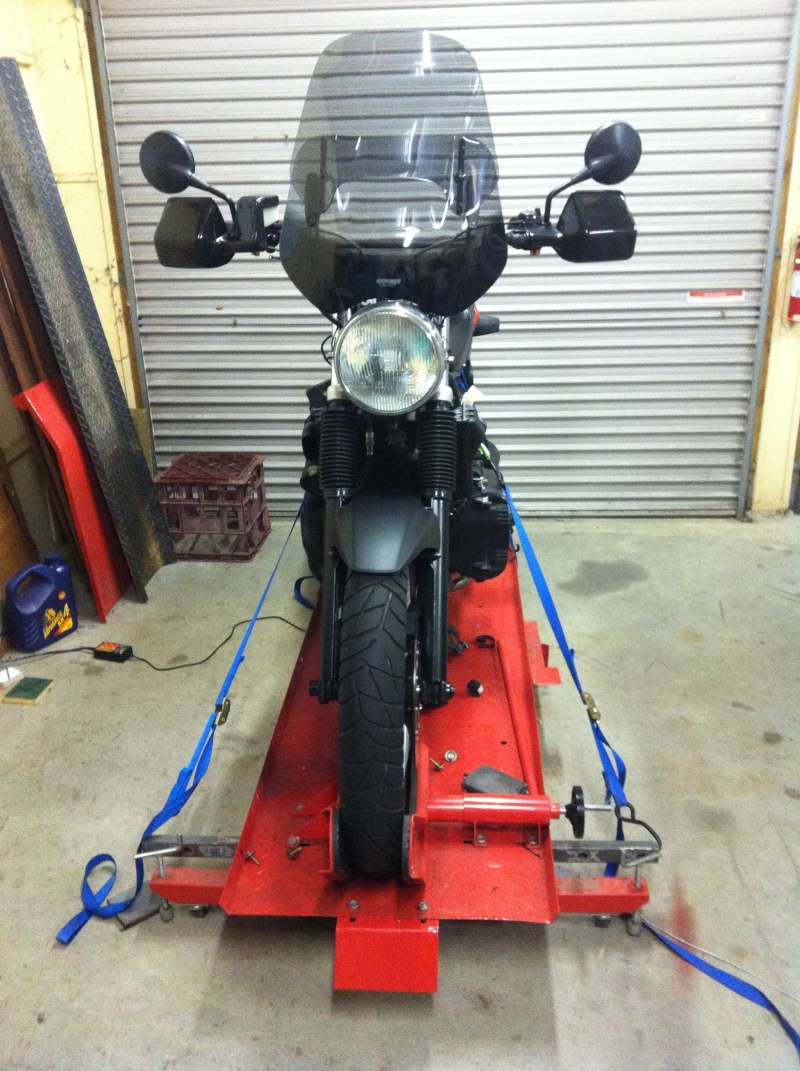
It was about this stage I was deciding about the handlebars. The bike came with chrome C bars which I found too narrow after having only ridden with the wide bars on my G/S and LT for the last 16 years. Referring again to the picture in my head I was leaning towards G/S bars but thought I best compare all three types (G/S, C, RT).

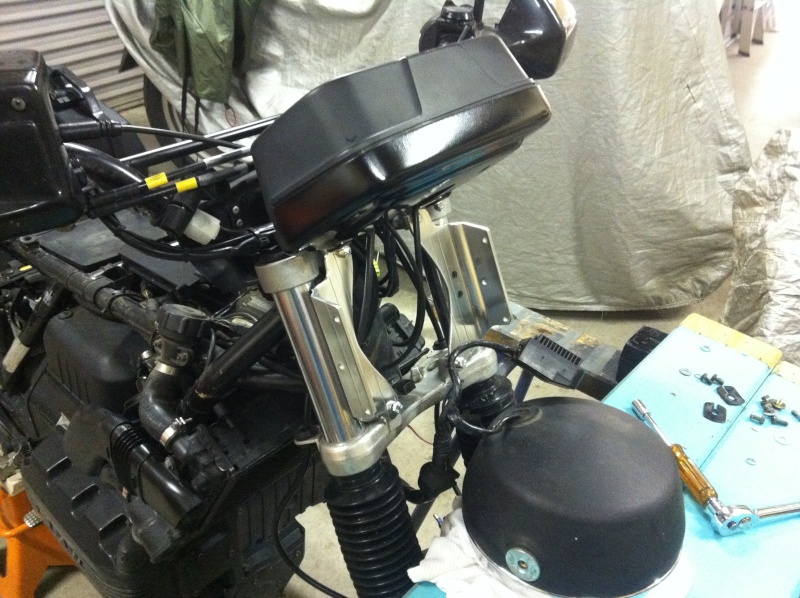
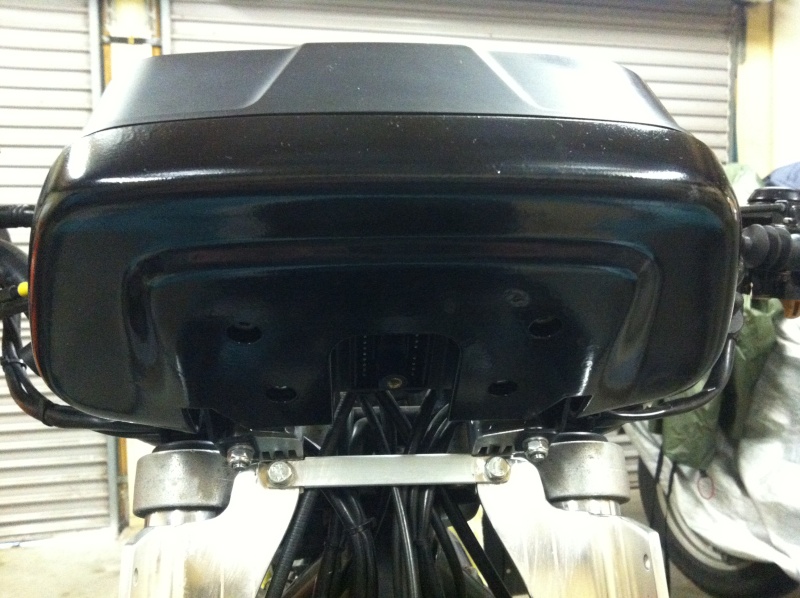
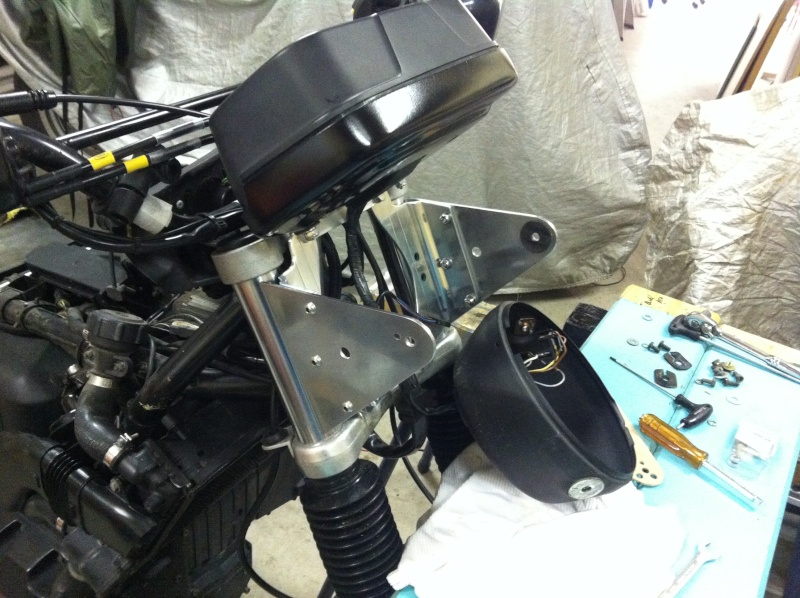
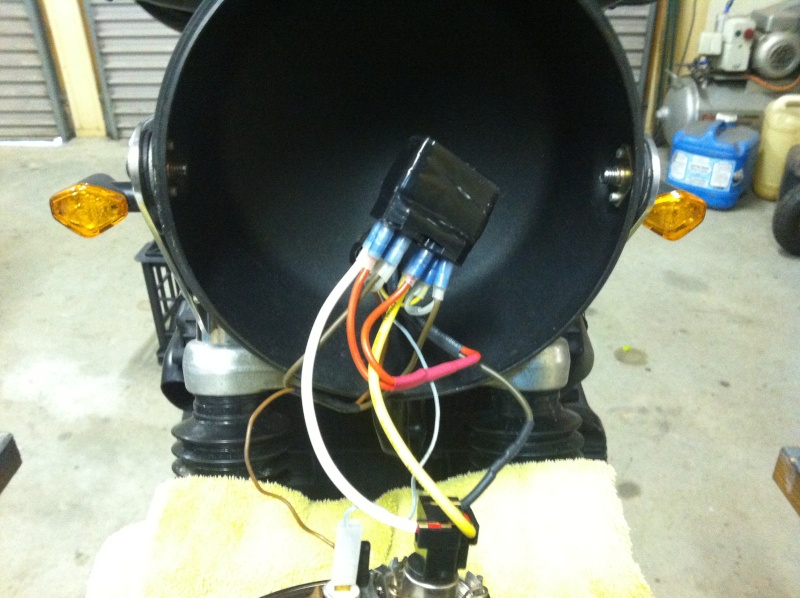
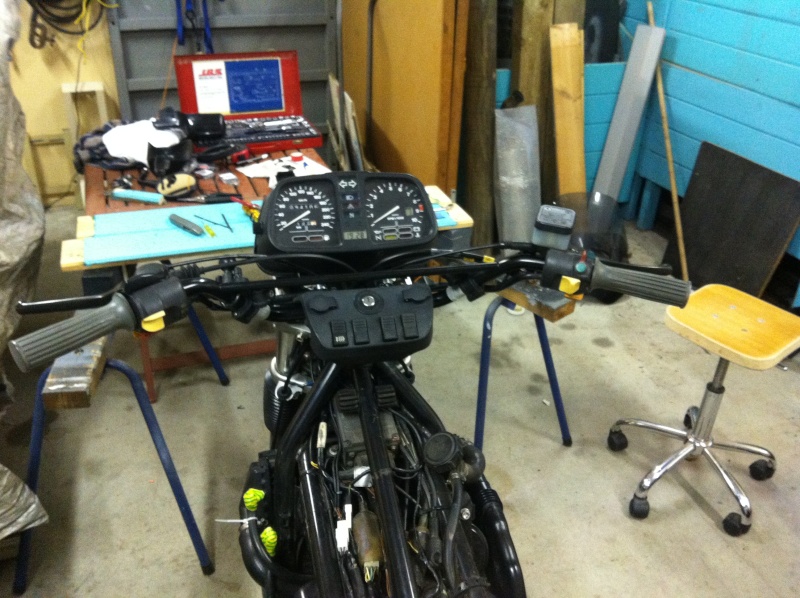
Eventually decided on the G/S bars and also ordered a set of BMW hand shields to go with them. I have used a MRA Vario screen on my G/S for many years and like it so I ordered another for this bike. Needed the longer control cables as well. Here are some photos of the initial fit up and screen mount etc.


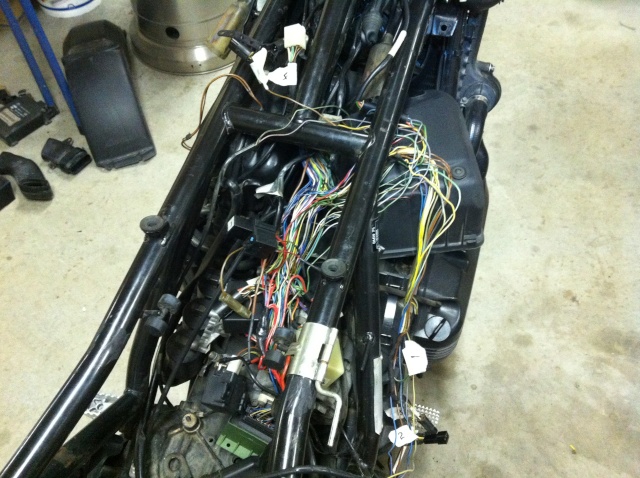
The switch blocks had been very stiff to operate and I was concerned that I would break something in there so I set up a little operating table on each side of the bike and very carefully dismantled each of them inside a plastic bag so as to catch any little springs etc. that might try to escape. Once apart I cleaned up with plain soap and water and polished the contacts then sprayed some silicon over all the bits and reassembled when they were dry. It was pretty straightforward so long as you take your time and the result was well worth it as the switches now operated as smooth as silk.

The stands were fairly stiff to operate and did not readily spring back into their raised position so I removed them for a clean up and lube and found that the sidestand bolt was bent quite a bit. Time to call in a little favour from one of my friends who has a lathe to turn a bolt down to suit the position.

Once cleaned, lubed and reassembled they were refitted and operate as they should. I will need to get them off again in the future to refurbish the bottom of the centre stand as the tubes have been worn flat, but they are OK for now.
With the style I was creating I thought it would be nice to have GS type foot pegs fitted so I looked all over the internet for a set that would bolt onto the K bike but obviously there is not a market for them. So one weekend when it took my fancy I made a set of my own using the alloy section of the standard pegs and spending some quality time with my files and aluminium strip. Helicoils were installed into the peg shaft to mount the worked aluminium strip and there you have a custom set of footpegs.

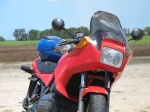
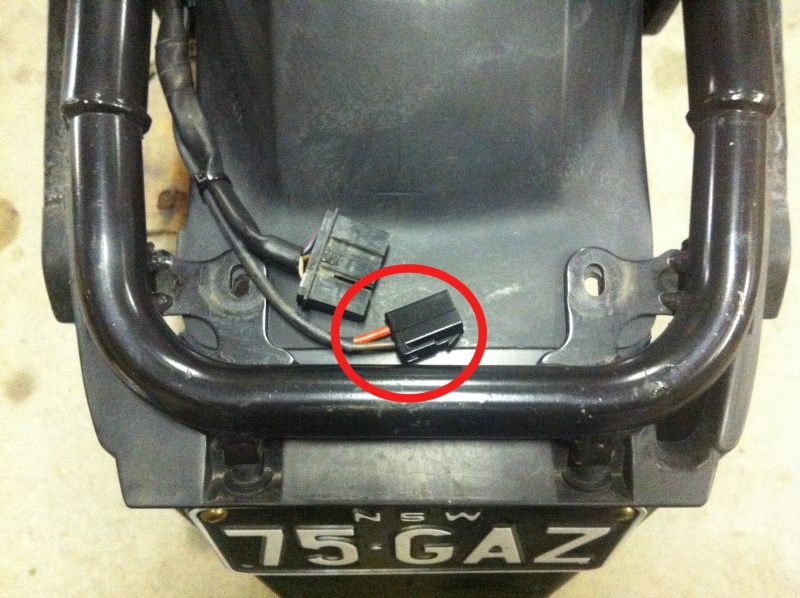
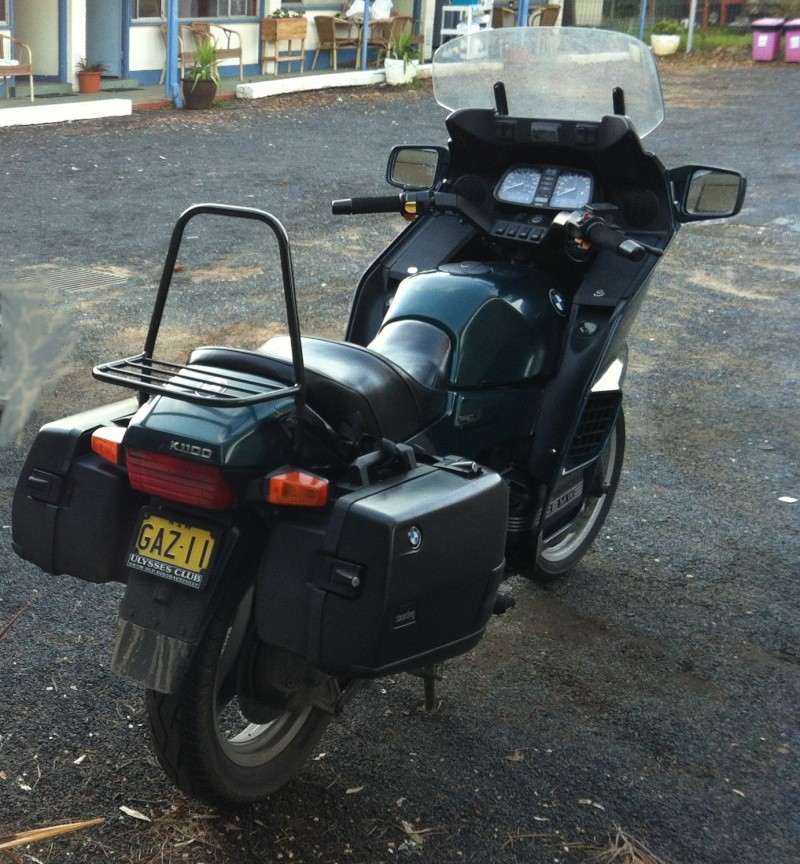
As there were a couple of forum trips coming up in the near future and I wanted to give the beast a decent run to see how I liked travelling on it I thought it had best join the GAZ family officially - the standard issue plates were exchanged for these (some scoundrel had already grabbed the GAZ75 set),

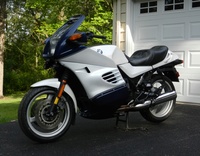
to keep company with [Gaz11, a 1995 K1100LT]
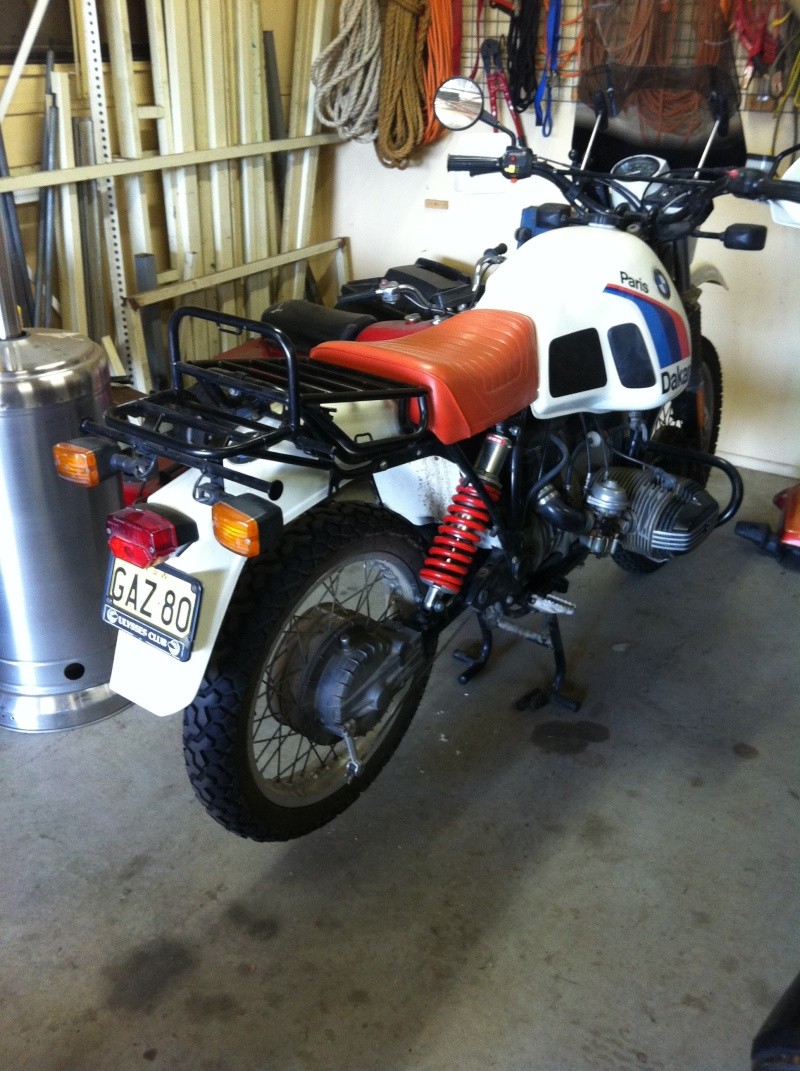
and [Gaz80, a 1987 R80G/S Paris Dakar]
To be continued ..........
The thought bubble for this project started way back in February 2012 when I was on the return leg of my 3,000km round trip to Phillip Island for the Australian round of the World Superbike series. I was riding my R80G/S Paris Dakar at the time, daydreaming (as you do on a long trip) about how much I loved this bike but also how good my K1100LT was for touring.
By the time I had completed the two day trip home I had a picture in my head of a K75 modified into an all road tourer influenced heavily by the style of my R80G/S. At the time I had never even sat on a K75 and had only ever seen a couple of them in the 15 years that I had owned my K1100.
So the search began …..... I looked at a few for sale but they were S models in very good condition and consequently far too expensive for what I had in mind. At the end of May 2012 I found what I was looking for in the back corner of a bike wrecker's warehouse in Sydney – a 1990 K75 (naked model with low seat and rear disk) with 77,447km showing on the odometer for $800.00. Apparently it hadn't run for the 3 years or so that it had been there but no parts were missing. Deal done, loaded onto the trailer and home it goes.
An initial walk around indicated that the fork seals were shot with most of the fork oil having soaked the brakes, broken mirrors, a few small cracks in the seat vinyl, badly faded paint – even though it looked orange the paint code said it was red, not too bad really if it will run.
Drained the old fuel from the tank and added some fresh stuff, changed oil and filter, new coolant and purchased a new battery – lets see what happens.
Good, she runs so lets get the forks off and clean up the front brakes. It took quite an effort to get the caps off the tubes as someone's previous effort at working on the forks had resulted in the top edge of the tubes being belted with some sort of punch which burred the inner edges over preventing the caps from coming out. I made up a small clamp like a bearing puller to hold the caps down against the springs so I could grind off the burrs and let the caps come out.
Next challenge was to get the fork tubes out of the triple clamps which again took quite a bit of time and patience combined with a fair bit of swearing. Once out new seals were fitted, a helicoil insert put in for the stripped drain plug on the left side, the sliders repainted and a pair of gaiters fitted, then slide them back in. These are the S type forks made by Brembo so I used 280 ml of 5 wt oil as recommended by TWB.
Since I was not going to use the radiator shroud I took it off and removed the radiator for a good clean as it had collected a fair bit of the leaking fork oil and was now full of oily dust. A check of the fan revealed the melted brush holder syndrome so I ordered a new motor from EME and fitted it. Before refitting the radiator to the bike I made up a stone guard using the mesh from the original shroud secured to adapter strips of aluminium that I mounted to the top and bottom of the radiator frame (arrowed in photo).
Cleaned up all of the front brake components ready for refitting. While the front guard was off I decided that it needed to be matt black to fit with the picture of the bike in my head so painted it before refitting.
The standard location on this model for the horn has it hanging from a bracket just below the bottom of the radiator (circled in the photo) right where it will get hammered by stones while travelling on gravel roads, which I hope to do a bit of with this toy. To improve the situation I used my well worked method of walking around and around the bike with measuring devices in hand testing every space that I could find to fit the horn. If I am relocating or fabricating any components for the bike I always try to utilise any existing holes/bolts etc. so that I do not drill, cut or weld onto the original frame; that way it can always be put back to standard by myself or a future owner if required. So the horn ended up living behind the radiator on the right hand side mounted on a little custom made bracket bolted to the frame at the front gusset.
Time to have a proper look into the tank – what do we find? A non standard fuel pump, type is a Delphi 6443224, hanging loosely in the plastic mounting collar secured by a cable tie.
Checked the pump dimensions and ordered a spacer sleeve, rubber skirt and plastic collar from EME and fitted up using worm clamps and remade the soldered connections onto the pump (has now been happily purring away for 17,000km).
Noticed that the tank had the usual weep from corrosion at the lowest point on each side.
So I took it to a guy in Sydney who had done some weld repairs on my R80G/S tank. He welded and pressure tested the tank so that should be it for the foreseeable future.
Once the tank and radiator were refitted the bike was run up to temperature to ensure the fan was coming on as required – it did, so cross off another couple of jobs.
Since I had now run the engine a few times naturally the water pump started to leak from the telltale hole, so order a rebuild kit and read up on the dreaded water pump overhaul procedure. The pump was removed and cleaned up (took much longer to do than to say), seals replaced and the pump repainted then refitted. I was not that confident when it was test run but all was well.
For this project I didn't want to initially spend a lot of money on a high quality shock until I had an idea of how much I would use this bike since I have two others in the shed but the original shock shaft looked as if it was scored. I sent it to RAD Shocky repairs in Brisbane who overhauled it and re-chromed the shaft for $240 which will do me for now.
While I had the rear shock off I was cleaning up around the rear end and noticed the cable to the speedo sensor had been crushed. The outer sheath was split open and one of the cores was cut through to the copper. I wasn't sure how sensitive the speedo electronics were to the impedance of the sensor circuit and whether a solder repair would affect it but decided to give it a go as water would get in and corrode it as it was – worst case is a new sensor. Happily the repair worked fine.
Now seemed the right time to check the condition of the drive shaft splines – not that happy with these.
After much agonising I decided to install a new aftermarket design drive shaft (and yes, I am aware of the mechanical issues of mating new and slightly worn splines) made by the Emerald Island company in Taiwan and sold in Australia by Munich Motorcycles. It was half the price of a BMW shaft. I liked some of the design features such as the blind cavity at the final drive end which means that the grease cannot migrate up the hollow shaft, grease-able and replaceable uni and replaceable cush rubbers. These are photos off their web site.
The big drawback is that you have to remove the swingarm to fit the shaft as the diameter across the uni is a fraction too large to slide in from the rear. There are some posts on the internet of people taking some material out with a grinder (from memory it was no more than a couple of millimetres) to allow the shaft to be slid in from the rear but that didn't sit well with me so I took the long way (hey - I had not had the swing arm out before). Gearbox output splines were good so re-lube both ends of drive shaft and reassemble. Still need to get into the gearbox input splines for a clean and lube.
The picture in my head always included the removal of the ducktail and replacement with a retro style short rack over the tail light with the bike being able to be fitted with either a dual seat or a single seat with intermediate rack. I have the ability to do this on my R80G/S having both the factory dual seat and single seat with rack.
The sequence of achieving this needed to be;
Fit the dual seat,
Remove the ducktail and fabricate the rear rack and tail light arrangement to align with the dual seat,
Have a single seat made up and fitted to the bike,
Fabricate the intermediate rack section to fit with the single seat.
The first step along this path was to remove the factory low seat on the K75 as it was too low for me and fit the BMW dual comfort seat from my K1100LT (I figured I could only ride one at a time so if dual seat was required it was only a few minutes work to change it over). All I had to do was fabricate the bracket for the rear seat hinge using the one from the K1100 as a pattern. Of course I didn't think of just buying a second hand one or in fact just bringing the bracket off the K1100 when I changed the seat over, but hey it was a good little fabrication exercise. I also obtained a second hand standard seat height toolbox/EFI control mount section with splash guard (this bike will not have side covers) and seat lock mechanism.
We are now up to January 2014 (it was a slow process finding the time for the project while having to fit work in) and it's time to get it registered and get some riding done. New mirrors were fitted and the necessary inspections completed with a few minor hassles due to the fact that this bike was imported into Australia privately and last registration (expired 3 years earlier) was not in New South Wales. Anyhow, licence plates on and away we go.
Now that it was on the road with tyres that had heaps of tread and were heaps of years old it was time to mount some new tyres. I had spent many hours on the internet reading tyre reports and checking available sizes as I intended to fit dual sport tyres if possible and eventually decided on a set of Pirelli Scorpion Trails. These are certainly not hard core dual sport being rated as 90/10 road/dirt but they were the only one that I could find with 100/90 x 18 (original size) front tyres. I chose a 140/80 x 17 for the rear as there is no 130/90 x 17 in that range. Interestingly Pirelli make them as a conventional front and radial rear. I found them to be very good for me particularly in the wet on sealed roads and probably a bit better than street tyres on gravel roads.
It was about this stage I was deciding about the handlebars. The bike came with chrome C bars which I found too narrow after having only ridden with the wide bars on my G/S and LT for the last 16 years. Referring again to the picture in my head I was leaning towards G/S bars but thought I best compare all three types (G/S, C, RT).
Eventually decided on the G/S bars and also ordered a set of BMW hand shields to go with them. I have used a MRA Vario screen on my G/S for many years and like it so I ordered another for this bike. Needed the longer control cables as well. Here are some photos of the initial fit up and screen mount etc.
The switch blocks had been very stiff to operate and I was concerned that I would break something in there so I set up a little operating table on each side of the bike and very carefully dismantled each of them inside a plastic bag so as to catch any little springs etc. that might try to escape. Once apart I cleaned up with plain soap and water and polished the contacts then sprayed some silicon over all the bits and reassembled when they were dry. It was pretty straightforward so long as you take your time and the result was well worth it as the switches now operated as smooth as silk.
The stands were fairly stiff to operate and did not readily spring back into their raised position so I removed them for a clean up and lube and found that the sidestand bolt was bent quite a bit. Time to call in a little favour from one of my friends who has a lathe to turn a bolt down to suit the position.
Once cleaned, lubed and reassembled they were refitted and operate as they should. I will need to get them off again in the future to refurbish the bottom of the centre stand as the tubes have been worn flat, but they are OK for now.
With the style I was creating I thought it would be nice to have GS type foot pegs fitted so I looked all over the internet for a set that would bolt onto the K bike but obviously there is not a market for them. So one weekend when it took my fancy I made a set of my own using the alloy section of the standard pegs and spending some quality time with my files and aluminium strip. Helicoils were installed into the peg shaft to mount the worked aluminium strip and there you have a custom set of footpegs.
As there were a couple of forum trips coming up in the near future and I wanted to give the beast a decent run to see how I liked travelling on it I thought it had best join the GAZ family officially - the standard issue plates were exchanged for these (some scoundrel had already grabbed the GAZ75 set),
to keep company with [Gaz11, a 1995 K1100LT]
and [Gaz80, a 1987 R80G/S Paris Dakar]
To be continued ..........
Last edited by Gaz80 on Tue Jul 28, 2015 9:36 pm; edited 1 time in total
__________________________________________________
Gaz
1990 K75 6427509; 1987 R80G/S PD 6292136; 2010 G650GS ZW13381;