1

 How to check and replace the Final Drive Crown Wheel Bearing and Seal Wed Apr 17, 2013 7:54 pm
MikeP

Life time member

Fortunately the bearing in the K-Series Final-Drive (F-D) isn't as prone to failures as it is in the R-Series 4-Valve Boxers but it is a service item that will wear out eventually.
The Paralever K-Series (K1, K100RS 16v and K1100RS/LT) may wear sooner than the non-Paralever models owing to the presence of the Paralever pivots which if worn can add some lateral play that may add to the stresses and thereby, wear the Crown Wheel bearing.
To check for play in the bearing, grasp the rear wheel at the 12 and 6 o'clock positions and push/pull in opposite directions. There should be no noticeable play. In some cases you may even hear a clunk.
With Paralever bikes also grasp the wheel at the 9 and 3 o'clock positions and push/pull. Again there should be no play. If there is, it's the Paralever pivot pins that are worn. The wear can be adjusted out but in my experience once the wear is adjusted for they soon wear again and need to be replaced (that's another topic and relatively simple). It's my theory that badly adjusted or worn Paralever pivots can lead to Crown Wheel bearing wear.
The photos in this thread are from a variety of bikes, I trust that it won't lead to confusion. As I said earlier, they all use the same Crown Wheel bearing arrangement.
The parts needed are minimal: A new bearing, main seal and O-ring:

These are not hugely expensive and you may not need the O-ring as it sometimes survives the process.
First remove the rear wheel and drain the F-D.
Next remove the rear disc. The two hex-screws are held with Loctite and this needs to be heated first to soften the compound. Although they are not done up very tight, attempting to undo them without heat is likely to lead to rounding-out the hex-key hole.
Tip: It's worth cleaning the screws and the threads once the screws are out and removing the old Loctite compound while it's still soft. I never re-Loctite the screws as the disc cannot go anywhere even without the screws once the wheel is on:
You can do this job without removing the whole F-D unit from the bike. I've done it in a dusty car park in Southern Morocco with the most basic of tools:

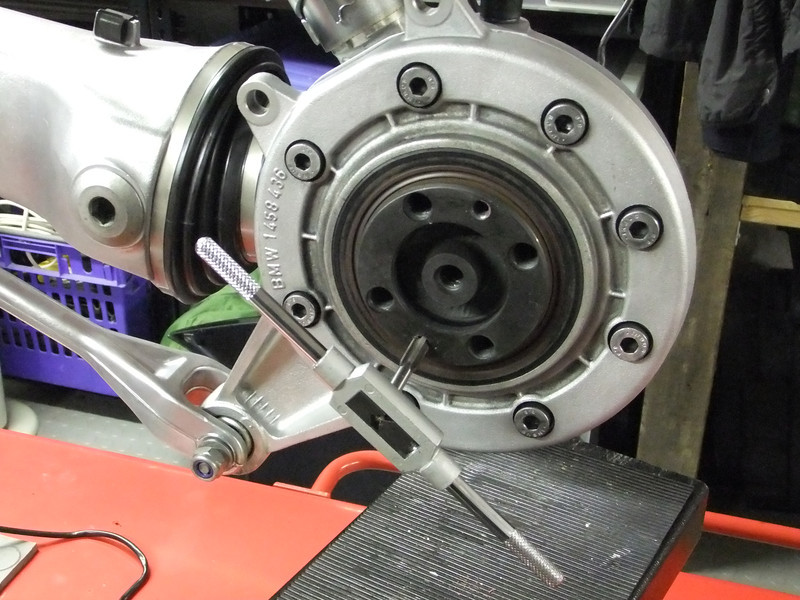
Now do the heat thing again for the eight hex-screws holding the F-D cover plate (these are not secured with Loctite but they are steel into aluminium and may be reluctant to move - heat will help break them free):

If the cover plate doesn't immediately come away (with the Crown Wheel so be aware that it is heavy) you will have to separate the two halves. Be careful, the O-ring is in a recess in the joint. Often after years the O-ring is past it so it's best to have one to hand. A broad screwdriver will work to lever the cover off.
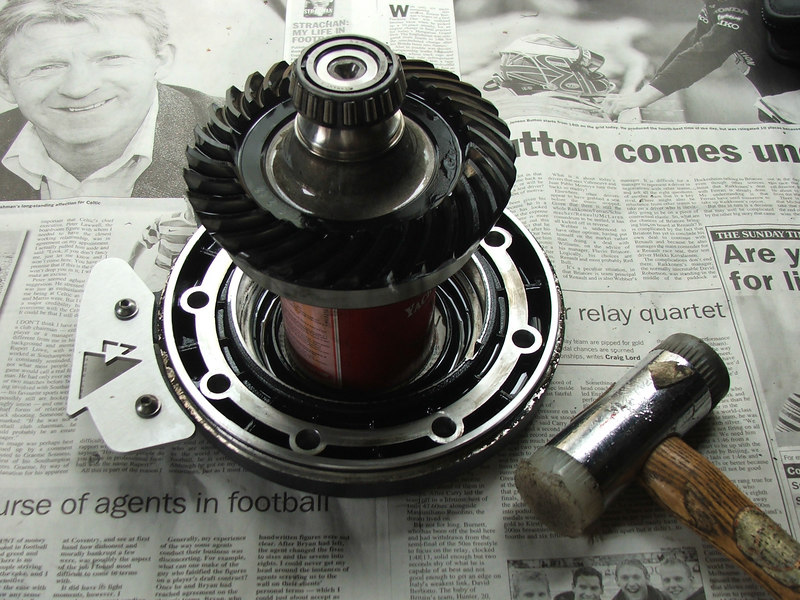
The Crown Wheel will most likely come away with the cover, held by the seal. If the Crown Wheel is reluctant to part company from the seal and cover plate, find a paint tin of a slightly smaller diameter, place the whole thing centred on the tin and press or tap the cover plate downwards:
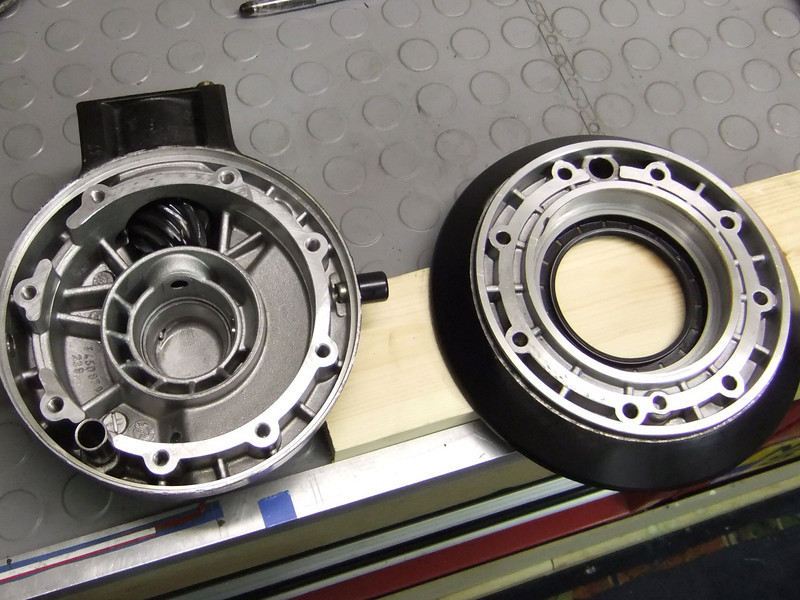
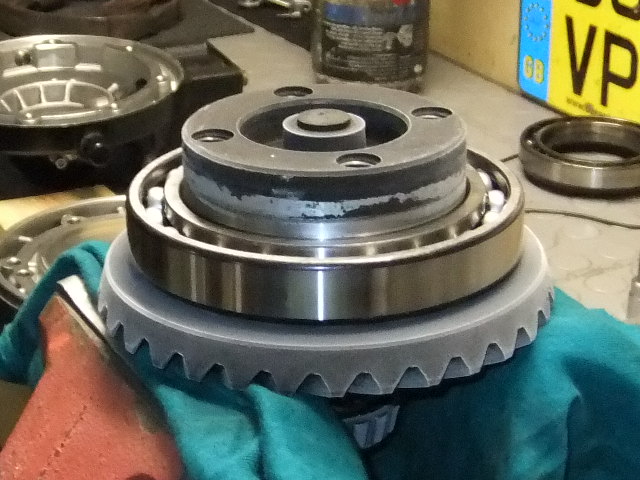
As the Crown Wheel separates from the cover plate you will probably find one or more shims between the Crown Wheel and the cover plate (K75C drum brake model housing here):

Now this may cause some debate: There are videos of how to re-shim the F-D. Unless you are replacing the cover plate there is no need to re-shim. The shims are to deal with variations in the cover plate and F-D housing and not the bearing. Simply replacing the bearing needs no re-shim. Any bearing set that is so variable that it needs shimming isn't worth fitting.
It doesn't matter what order the shims are in. What matters is that they are there and that you put them (all) back when you reassemble things.
Take this opportunity to clean both the cover plate and the F-D housing.
Now the only bit that can cause a bit of grunting and cussing, separating the bearing from the Crown Wheel. Tyre levers will do, or old screwdrivers if you have no pry-bars.
It's not that it's particularly difficult to separate the two, nor do you really need to be that careful as the bit that is most likely to be damaged is the bit that you will be replacing - the bearing.
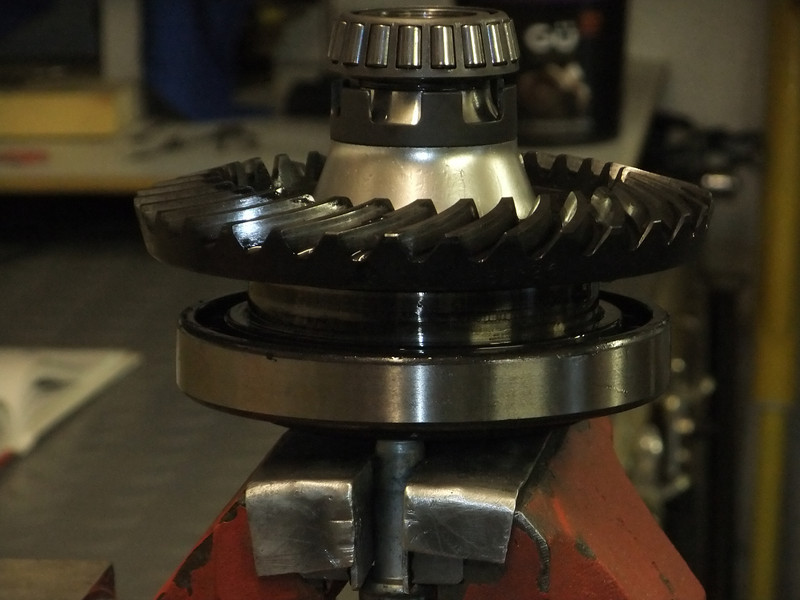
In my garage I use two old rear wheel bolts screwed into the Crown Wheel and clamp them in the vice. Then start to lever the bearing downwards. Once it begins to move, it becomes quite easy from there:
A bearing puller is nice but that presents the problem of how to hold things while the puller does its work. You do not want to clamp the the other end and damage the taper roller bearing (which very rarely needs replacing but is more involved to do so).

Give the Crown Wheel a clean then wrap it in a plastic bag and pop it into the freezer.
Push out the old seal. Lubricate the new one and fit it into the cover plate making sure that it sits flush (have a good look at the old one and how it seats level before you remove it).
After the Crown Wheel has had half-an-hour or more in the freezer, take the new bearing and heat it up. Warm it is possibly a better description. It doesn't need to be very hot as the cold Crown Wheel will do more work for you. I use an old non-stick pan and a "bluey":

Now retrieve the cold Crown Wheel from the freezer (wear gloves if it's very cold, you don't want to stick to it) and using some pliers take the warm (new) bearing and it will slip over the cold Crown Wheel:
It should seat properly without any persuasion but tap it down fully if needs be. Only tap it on the inner ring of the bearing cage (close to the Crown Wheel body). The bearing cage will take high loads in its radial axis but lateral forces may distort it when it's unsupported.
Leave it to all return to ambient temperature and any condensation is dried off, then seat the Crown Wheel and bearing in the F-D housing, fit the new O-ring (if required) and then replace the cover plate.
Reassembly from there is straight forward, just put everything back and re-fill the F-D.
The whole job can be done inside a couple of hours at the most.
As said, failures are rare on K-Bricks. Even with some wear they are not prone to the sort of failures that afflicted the R-Series (and to a lesser degree the 1200 K-Bikes). An occasional check for wear is all that's needed. I would recommend investigating any wear early as excessive play will damage the housing if not sorted.
One further point: The bearing you remove may have 17 ball bearings in the cage and the replacement should have 19. The 19 ball bearing race was an effort to address the failures in the 4-valve Boxers.
The Paralever K-Series (K1, K100RS 16v and K1100RS/LT) may wear sooner than the non-Paralever models owing to the presence of the Paralever pivots which if worn can add some lateral play that may add to the stresses and thereby, wear the Crown Wheel bearing.
To check for play in the bearing, grasp the rear wheel at the 12 and 6 o'clock positions and push/pull in opposite directions. There should be no noticeable play. In some cases you may even hear a clunk.
With Paralever bikes also grasp the wheel at the 9 and 3 o'clock positions and push/pull. Again there should be no play. If there is, it's the Paralever pivot pins that are worn. The wear can be adjusted out but in my experience once the wear is adjusted for they soon wear again and need to be replaced (that's another topic and relatively simple). It's my theory that badly adjusted or worn Paralever pivots can lead to Crown Wheel bearing wear.
The photos in this thread are from a variety of bikes, I trust that it won't lead to confusion. As I said earlier, they all use the same Crown Wheel bearing arrangement.
The parts needed are minimal: A new bearing, main seal and O-ring:
These are not hugely expensive and you may not need the O-ring as it sometimes survives the process.
First remove the rear wheel and drain the F-D.
Next remove the rear disc. The two hex-screws are held with Loctite and this needs to be heated first to soften the compound. Although they are not done up very tight, attempting to undo them without heat is likely to lead to rounding-out the hex-key hole.
Tip: It's worth cleaning the screws and the threads once the screws are out and removing the old Loctite compound while it's still soft. I never re-Loctite the screws as the disc cannot go anywhere even without the screws once the wheel is on:
You can do this job without removing the whole F-D unit from the bike. I've done it in a dusty car park in Southern Morocco with the most basic of tools:
Now do the heat thing again for the eight hex-screws holding the F-D cover plate (these are not secured with Loctite but they are steel into aluminium and may be reluctant to move - heat will help break them free):
If the cover plate doesn't immediately come away (with the Crown Wheel so be aware that it is heavy) you will have to separate the two halves. Be careful, the O-ring is in a recess in the joint. Often after years the O-ring is past it so it's best to have one to hand. A broad screwdriver will work to lever the cover off.
The Crown Wheel will most likely come away with the cover, held by the seal. If the Crown Wheel is reluctant to part company from the seal and cover plate, find a paint tin of a slightly smaller diameter, place the whole thing centred on the tin and press or tap the cover plate downwards:
As the Crown Wheel separates from the cover plate you will probably find one or more shims between the Crown Wheel and the cover plate (K75C drum brake model housing here):
Now this may cause some debate: There are videos of how to re-shim the F-D. Unless you are replacing the cover plate there is no need to re-shim. The shims are to deal with variations in the cover plate and F-D housing and not the bearing. Simply replacing the bearing needs no re-shim. Any bearing set that is so variable that it needs shimming isn't worth fitting.
It doesn't matter what order the shims are in. What matters is that they are there and that you put them (all) back when you reassemble things.
Take this opportunity to clean both the cover plate and the F-D housing.
Now the only bit that can cause a bit of grunting and cussing, separating the bearing from the Crown Wheel. Tyre levers will do, or old screwdrivers if you have no pry-bars.
It's not that it's particularly difficult to separate the two, nor do you really need to be that careful as the bit that is most likely to be damaged is the bit that you will be replacing - the bearing.
In my garage I use two old rear wheel bolts screwed into the Crown Wheel and clamp them in the vice. Then start to lever the bearing downwards. Once it begins to move, it becomes quite easy from there:
A bearing puller is nice but that presents the problem of how to hold things while the puller does its work. You do not want to clamp the the other end and damage the taper roller bearing (which very rarely needs replacing but is more involved to do so).
Give the Crown Wheel a clean then wrap it in a plastic bag and pop it into the freezer.
Push out the old seal. Lubricate the new one and fit it into the cover plate making sure that it sits flush (have a good look at the old one and how it seats level before you remove it).
After the Crown Wheel has had half-an-hour or more in the freezer, take the new bearing and heat it up. Warm it is possibly a better description. It doesn't need to be very hot as the cold Crown Wheel will do more work for you. I use an old non-stick pan and a "bluey":
Now retrieve the cold Crown Wheel from the freezer (wear gloves if it's very cold, you don't want to stick to it) and using some pliers take the warm (new) bearing and it will slip over the cold Crown Wheel:
It should seat properly without any persuasion but tap it down fully if needs be. Only tap it on the inner ring of the bearing cage (close to the Crown Wheel body). The bearing cage will take high loads in its radial axis but lateral forces may distort it when it's unsupported.
Leave it to all return to ambient temperature and any condensation is dried off, then seat the Crown Wheel and bearing in the F-D housing, fit the new O-ring (if required) and then replace the cover plate.
Reassembly from there is straight forward, just put everything back and re-fill the F-D.
The whole job can be done inside a couple of hours at the most.
As said, failures are rare on K-Bricks. Even with some wear they are not prone to the sort of failures that afflicted the R-Series (and to a lesser degree the 1200 K-Bikes). An occasional check for wear is all that's needed. I would recommend investigating any wear early as excessive play will damage the housing if not sorted.
One further point: The bearing you remove may have 17 ball bearings in the cage and the replacement should have 19. The 19 ball bearing race was an effort to address the failures in the 4-valve Boxers.