BMW K bikes (Bricks)


You are not connected. Please login or register

View previous topic View next topic Go down  Message [Page 1 of 1]


1Back to top Go down   16-Valve Bike Fork Seal Change Empty 16-Valve Bike Fork Seal Change Tue Apr 16, 2013 4:44 am

MikeP

MikeP
Life time member
Life time member
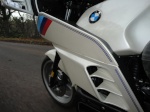
When I checked the K1 that I bought in October 2012, I discovered that one of the fork seals was misting slightly (it was picked-up as an "advisory" on the annual inspection required for registration and licensing).

Well I replaced it during the general strip-down and clean-up.

In my defence, I will say that I followed the official BMW service manual and it seemed no different to any other fork seal change: Get the bits and pieces stripped off until the oil can be drained, the slider removed from the stanchion, the old seal removed, a new seal fitted and re-assemble in the reverse order.

I am a bit anal about making sure the stanchion is clean before the slider complete with new seal is slid back on and about leaving the fork brace and axle pinch bolts un-tightened on one leg until it has been "settled" by compressing the front-end a couple of times.

My first attempt to replace the seal failed at this early stage. Two bounces of the front and oil was pissing out of the seal (certainly much more than was used to lubricate the seal).

Back to square one.

The next seal seemed to be holding but it too let go within a few road miles.

So in went a third and the fourth that has been in that slider since October. It let go yesterday while road testing my TB balance and oil-water pump seal replacement.

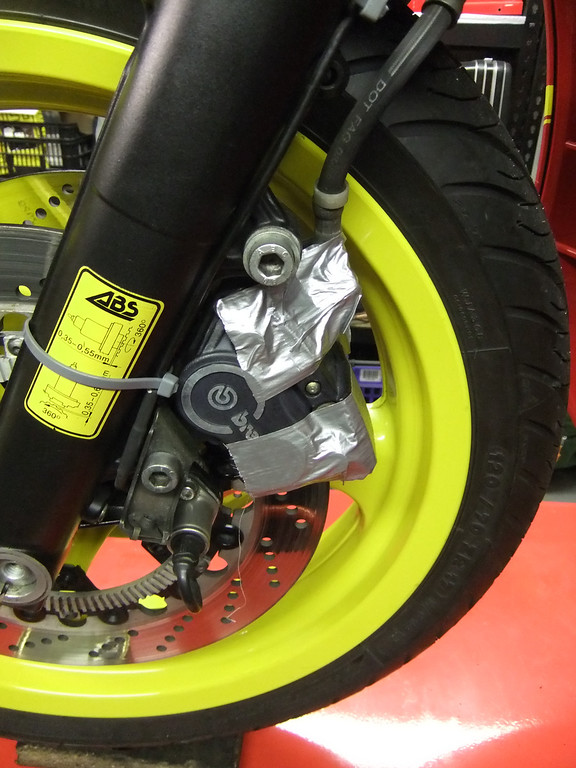
This is how the one before last looked once it was removed:

16-Valve Bike Fork Seal Change K1%20BMW%20%28368%29-L

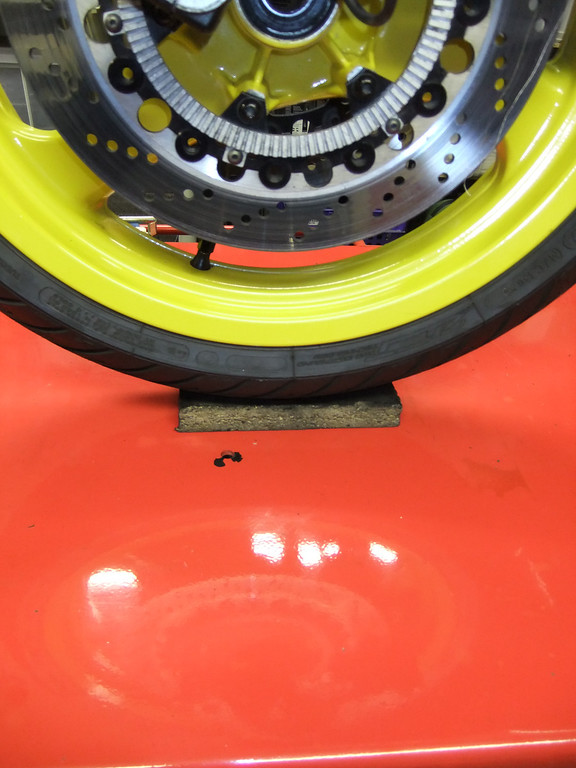
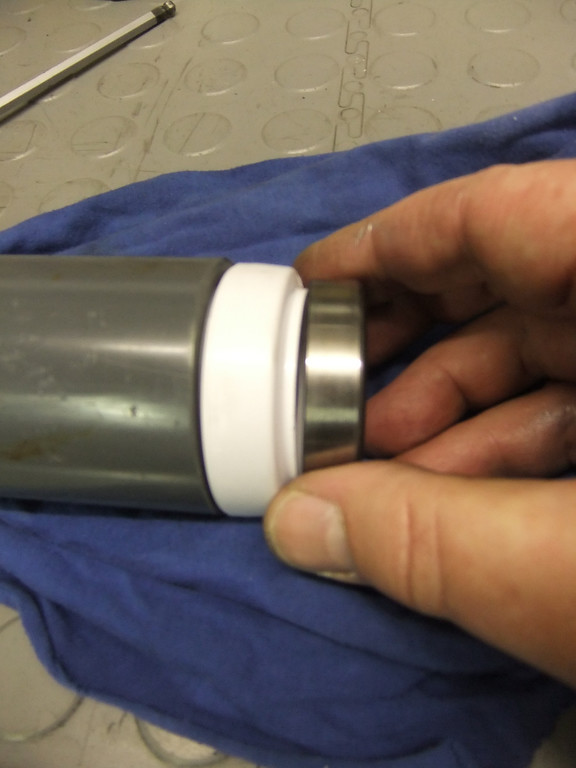
The culprit seems to be the "sliding bushing" (how the BMW manual refers to this steel ring):

16-Valve Bike Fork Seal Change K1%20BMW%20%28369%29-L

It's not possible to fully compress the thing to get the slider to pass over and it damages the seal as it does so.

Anyway, a Clymer manual (I don't have one - yet. One is on the way) might tell a different story to the BMW one and it might agree with what I learned yesterday while ordering (another) new seal:

Remove the whole fork leg from the bike. Separate the slider from the stanchion as normal, remove the snap-ring and old seal then re-fit the slider to the stanchion and then fit the new seal over the stanchion followed by the snap-ring.

This then begged the question of how the new seal is seated properly. I was told that there's a special tool that goes over the stanchion and is then tapped down to seat the new seal. I could certainly borrow theirs, problem is, they've never had to use one since the dealership is a lot newer than any 16-valve bike fitted with Marzocchi forks.

Short of finding a piece of scaffold pipe with the correct internal and external diameters, I set my mind to making my own "special tool". I think I have the necessary bits and pieces together and will report on the success or failure in due course.

So after all that waffle, the upshot is that I no longer have faith in the official BMW manual and I've learned something that others here probably knew: Marzocchi fork seals need to be fitted differently.

What I need to do now is sort out what the oil capacity is for each leg. I've read things like 350ml in one and 400ml in the other even one source that says the K1 has 450ml per leg:

http://bmwmotorcycletech.info/kforkoil.htm

The (now distrusted) BMW manual says 400ml per leg and makes no mention of a slight reduction between an oil change and a full strip.

scratch


2Back to top Go down   16-Valve Bike Fork Seal Change Empty Re: 16-Valve Bike Fork Seal Change Tue Apr 16, 2013 4:54 am

Rick G

Rick G
admin
admin
In the other thread I mentioned about 400 in one and 350 in the other but that is only for a straight forward oil change and is because the oil doesn't fully drain from the fork with the rebound damping. If as you did a full strip down then its 400cc in each leg. Apparently this is onky for the K1100s.
I will post a chart of what is what as I am a bit out
16-Valve Bike Fork Seal Change Image211

I got this from either Inge or Zonnenfiel so it should be correct.


__________________________________________________
"Man sacrifices his health in order to make money.
Then he sacrifices money to recuperate his health.
And then he is so anxious about the future that he does not enjoy the present; the result being that he does not live in the present or the future; he lives as if he is never going to die, and then dies having never really lived."   Dalai Lama


Bikes 1999 K1100 LT with a Big Block 1200
    

3Back to top Go down   16-Valve Bike Fork Seal Change Empty Re: 16-Valve Bike Fork Seal Change Tue Apr 16, 2013 5:33 am

MikeP

MikeP
Life time member
Life time member
Cheers Rick. I've always reduced the amount I add when it's just a service oil change. It's a bit odd that BMW doesn't make that distinction in the manual (it only gives the capacity in the "Operating media and service data" chapter.

16-Valve Bike Fork Seal Change 112350


4Back to top Go down   16-Valve Bike Fork Seal Change Empty Re: 16-Valve Bike Fork Seal Change Tue Apr 16, 2013 5:46 am

mike d

avatar
Life time member
Life time member
Hi Mike,

I have a K1100LT BMW Manual, and it shows assembling the oil seal by sliding it down from the top of the fork tube

It also shows the different oil quantities (o.k. not the 0.38 as per the chart):

Oil change:
left..................0,35 - 0,01 l (0.616 - 0.0176 Imp. pt)
right ...............0,40 - 0,01 l (0.704 - 0.0176 Imp. pt)
New filling:
left, right.........0,40 - 0,01 l (0.704 - 0.0176 Imp. pt)

It is a big file, but i could try sending it to you via email (pm me with your email address).

Mike


5Back to top Go down   16-Valve Bike Fork Seal Change Empty Re: 16-Valve Bike Fork Seal Change Tue Apr 16, 2013 6:02 am

Rick G

Rick G
admin
admin
@ mike d the bike is a K1 not a K1100 they are apparently different.


__________________________________________________
"Man sacrifices his health in order to make money.
Then he sacrifices money to recuperate his health.
And then he is so anxious about the future that he does not enjoy the present; the result being that he does not live in the present or the future; he lives as if he is never going to die, and then dies having never really lived."   Dalai Lama


Bikes 1999 K1100 LT with a Big Block 1200
    

6Back to top Go down   16-Valve Bike Fork Seal Change Empty Re: 16-Valve Bike Fork Seal Change Tue Apr 16, 2013 6:44 am

mike d

avatar
Life time member
Life time member
Agreed, but the K1100 forks were based on the K1, so sliding the oil seal from the top still applies.

Mike


7Back to top Go down   16-Valve Bike Fork Seal Change Empty Re: 16-Valve Bike Fork Seal Change Tue Apr 16, 2013 7:44 am

Rick G

Rick G
admin
admin
True although I have done quite a few over the years (the K100and 75 are the same slider and bush setup) and have never put the seal on after the tube has been inserted and never had a problem. The only seal that I have had blow after a seal replacement was on my own K1100 when I used a "Pyramid Parts" seal and it was the seal as it actually folded the seal lip inside out and it happened when I went front into an enormous pothole at slow speed. It was in the shadows and was an "Oh S**t moment".


__________________________________________________
"Man sacrifices his health in order to make money.
Then he sacrifices money to recuperate his health.
And then he is so anxious about the future that he does not enjoy the present; the result being that he does not live in the present or the future; he lives as if he is never going to die, and then dies having never really lived."   Dalai Lama


Bikes 1999 K1100 LT with a Big Block 1200
    

8Back to top Go down   16-Valve Bike Fork Seal Change Empty Re: 16-Valve Bike Fork Seal Change Tue Apr 16, 2013 7:47 am

K75cster

K75cster
Life time member
Life time member
Mike I thought it was a matter of putting the seal on the leg then installing the leg into the slider then setting the seal and using a plastic length of tubing to seat it properly a c spanner to tap it in then reassemble the forks,


__________________________________________________
Keith - 1987 K75c with r100rt replica fairing and half of a 1984 K100rt 1992 K1100LT a blue one

The Clever are adept at extricating themselves from situations that the wise would have avoided from the outset - QUOTE from david Hillel in Out of the Earth.
    

9Back to top Go down   16-Valve Bike Fork Seal Change Empty Re: 16-Valve Bike Fork Seal Change Tue Apr 16, 2013 7:58 am

Inge K.

Inge K.
VIP
VIP
MikeP wrote: What I need to do now is sort out what the oil capacity is for each leg. I've read things like 350ml in one and 400ml in the other even one source that says the K1 has 450ml per leg
Late models (08/91 on) have the same fork internals (and oil levels) as the K11's.

According to a service bulletin from june -91, the fork seals should be mounted from
the top of the stanchions on K1 and RS4V models.


__________________________________________________
Inge K.
K100RS -86. (first owner), K1100LTSE -94.
    

10Back to top Go down   16-Valve Bike Fork Seal Change Empty Re: 16-Valve Bike Fork Seal Change Tue Apr 16, 2013 8:40 am

MikeP

MikeP
Life time member
Life time member
Yes that's the process but I didn't know and my manual says to do what Rick says, what I've done with every K-Series fork seal in the past.

mike d, yes the forks are the same (same part number on the fiche). It just seems that the manuals give different instructions.

Inge, Thanks for the update. My manual pre-dates that bulletin so explains the difference.

As it's possible that others are as ignorant as me, here's the process so far and my "special tool";

I apologise if this is known to you but it may help someone.

This bike costs me almost as much in gaffer tape as it does in fork seals Rolling Eyes . I tape the callipers rather than the wheel as I used to do. It means that there's no chance of the taped wheel section not being in line when reassembling.

16-Valve Bike Fork Seal Change K1%20BMW%20%28401%29-XL

Then I place something under the wheel so that it doesn't drop too far once the axle is removed:

16-Valve Bike Fork Seal Change K1%20BMW%20%28402%29-XL

Then the wheel can be rolled back towards the engine to provide more room for easing the callipers off the disc:

16-Valve Bike Fork Seal Change K1%20BMW%20%28403%29-XL

I then wrap the callipers in a rag and suspend on bungees to relieve and stress on the brake hoses.

To get at the upper and lower stanchion clamp screws on a K1 you need to remove the knee pad, inner fairing panel, disconnect the temperature gauge and as it's the right-hand leg, the fairing cubby has to come out.

16-Valve Bike Fork Seal Change K1%20BMW%20%28398%29-XL

I'm not sure if the clamp screws have been disturbed since assembly in 1989 so I gave them a little heat to break any oxidisation and then removed the screws altogether in case the threads needed cleaning.

The new seal hasn't arrived yet (it should be on my doormat tomorrow if the Postie keeps to his usual timing) so I'll just see if my "special tool" is going to do the job.

Here it is in all it's glory:

16-Valve Bike Fork Seal Change K1%20BMW%20%28392%29-XL

What it is is two bits of plastic pipe and an old steering bearing race.

The race I keep to use as a drift when tapping the new ones into the headstock.

16-Valve Bike Fork Seal Change K1%20BMW%20%28394%29-XL

Then the white part is a 40mm push-fit domestic plumbing joint (for UK readers, £1.98 in B&Q):

16-Valve Bike Fork Seal Change K1%20BMW%20%28395%29-XL

It has a 'stop' halfway down the inside:

16-Valve Bike Fork Seal Change K1%20BMW%20%28396%29-L

The stop ridge needs to be cut, hacked, filed or otherwise removed to allow it to slide over the stanchion. It doesn't have to be neat as it doesn't touch the stanchion at all:

16-Valve Bike Fork Seal Change K1%20BMW%20%28397%29-XL

The old race sits nicely over the ridge on the base of the pipe connector:

16-Valve Bike Fork Seal Change K1%20BMW%20%28409%29-XL

16-Valve Bike Fork Seal Change K1%20BMW%20%28393%29-XL

The grey outer is an off cut of a heavier duty plastic pipe and only there to provide a thicker wall onto which downward pressure can be exerted.

The old race has plenty of inner clearance around the stanchion:

16-Valve Bike Fork Seal Change K1%20BMW%20%28405%29-XL

Yet sits on the seal and inside the snap ring at the correct height to seat the seal:

16-Valve Bike Fork Seal Change K1%20BMW%20%28406%29-L

The push-fit pipe then locates nicely inside the old race:

16-Valve Bike Fork Seal Change K1%20BMW%20%28407%29-L

And the grey pipe gives a wider area to either tap with a mallet or I may make-up something that will allow me to press down upon.

16-Valve Bike Fork Seal Change K1%20BMW%20%28408%29-L

I'll use the old seal over the new one if I feel the need to add some protection before pressing/tapping down.

Well that's the theory anyway. I'll find out soon enough if it works. Wink


11Back to top Go down   16-Valve Bike Fork Seal Change Empty Re: 16-Valve Bike Fork Seal Change Wed Apr 17, 2013 4:50 pm

MikeP

MikeP
Life time member
Life time member
Well it worked a treat. At least as far as fitting the new seal is concerned.

I found that with the base of the reassembled fork leg on the ground, I could exert enough downward pressure by hand to seat the (lubricated) new seal without needing any tapping with a mallet.

With the stanchion in place getting the snap ring to seat was a bit more fiddly but doable.

It's not all back together and a test ride will be needed before I can hang out the flags but I'm nearly convinced that this one will hold.


12Back to top Go down   16-Valve Bike Fork Seal Change Empty Re: 16-Valve Bike Fork Seal Change Wed Apr 17, 2013 5:12 pm

MT350Explorer

MT350Explorer
Life time member
Life time member
Well done Mike. Thanks for posting all this info. When the time comes this will be a great thread to refer to for 16 valve owners. (Although based on your experience I'm not looking forward to it!)
Cheers
Dave Smile


__________________________________________________
1991 K100 RS 16 valve
    

Sponsored content


View previous topic View next topic Back to top  Message [Page 1 of 1]

Permissions in this forum:
You cannot reply to topics in this forum