BMW K bikes (Bricks)


You are not connected. Please login or register

View previous topic View next topic Go down  Message [Page 1 of 1]


StandardK

StandardK
Gold member
Gold member
Hi all,

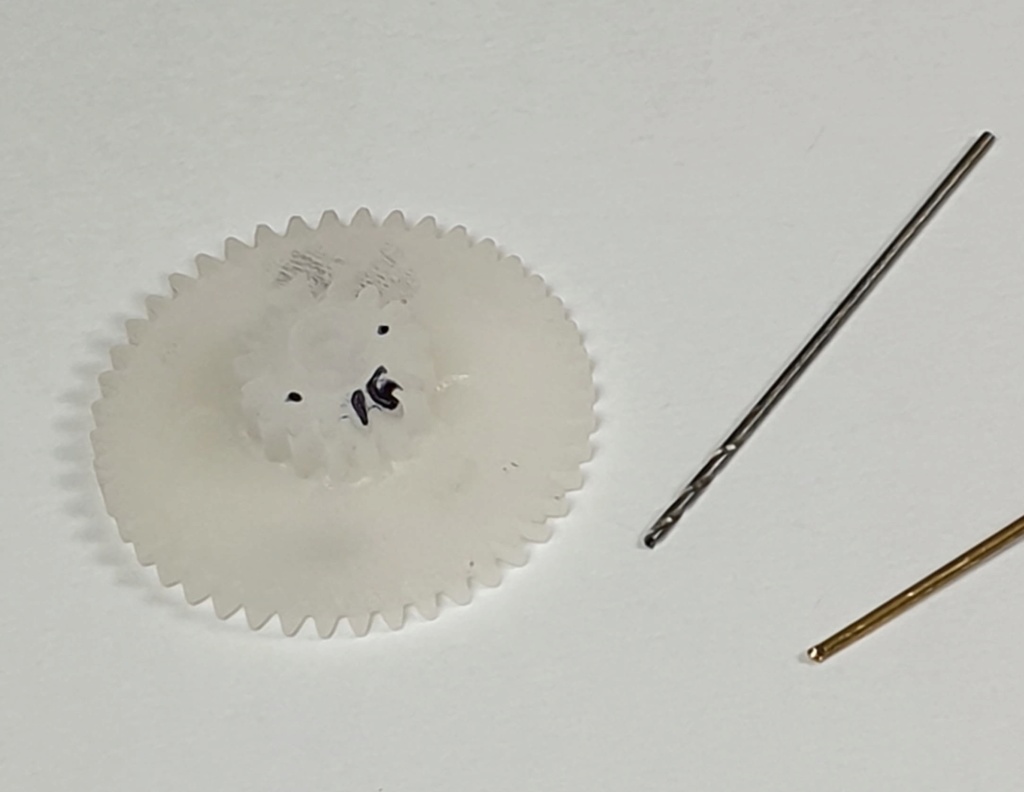
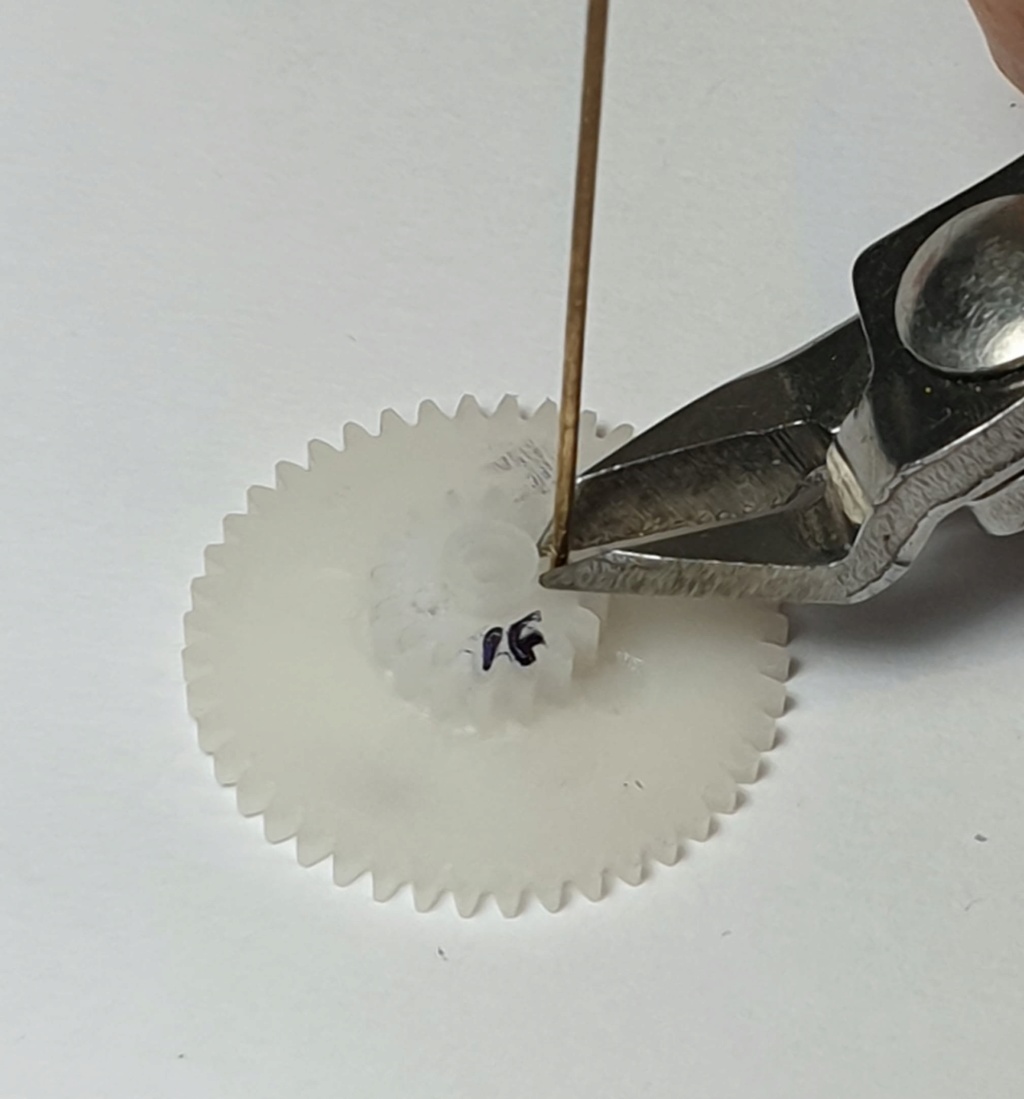
I thought I would post up a guide to replacing the notorious stripped OEM gears on a K Odometer, using the cheap plastic gears commonly found in generic hobby sets on fleaBay or in electronics/hobby stores. The repair as shown here cost a grand total of $6 AUD (plus a few hours of your time)- they were kindly supplied by Martin W for the Project. It requires no specialist tools, just a cordless drill, small file, superglue, some small diameter brass rod & some teeny drill bits. 

I also begin by a disclaimer stating no warranties or guarantees for the following repair if attempted! But hey, for $6 it’s worth a try, no?  Rolling Eyes  I also offer apologies if this info is already “old hat” news. 

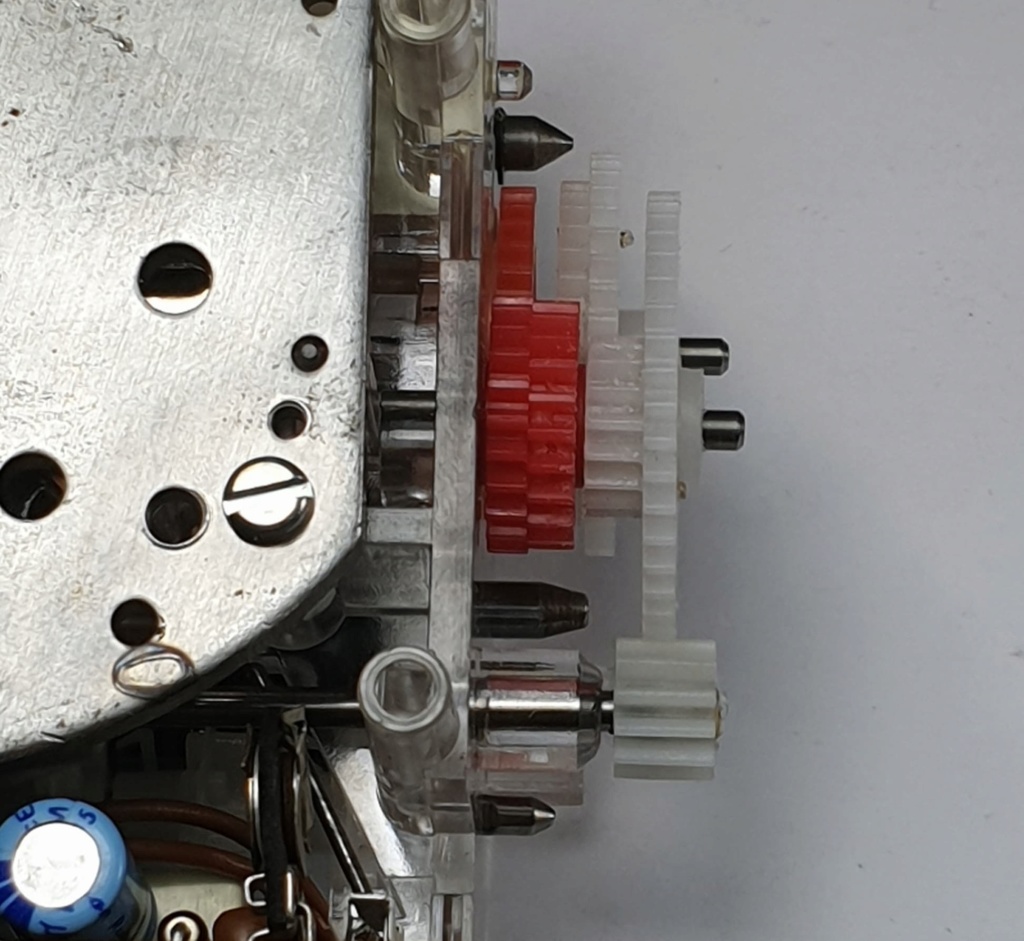
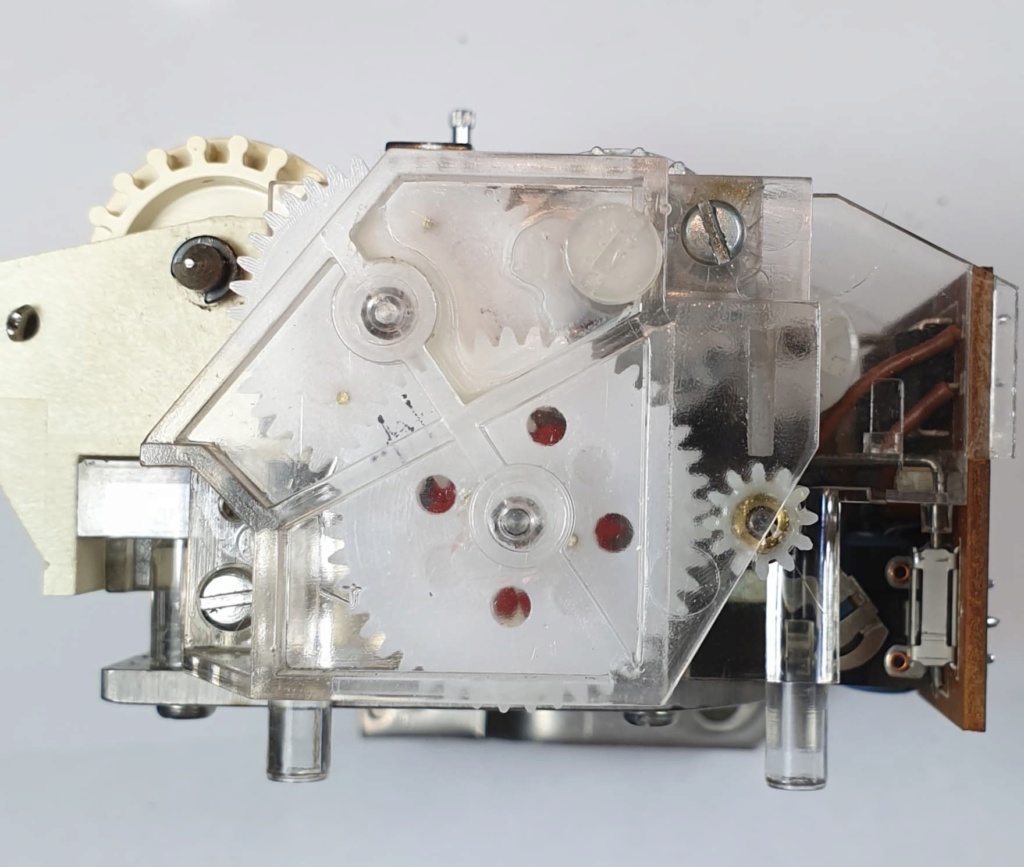
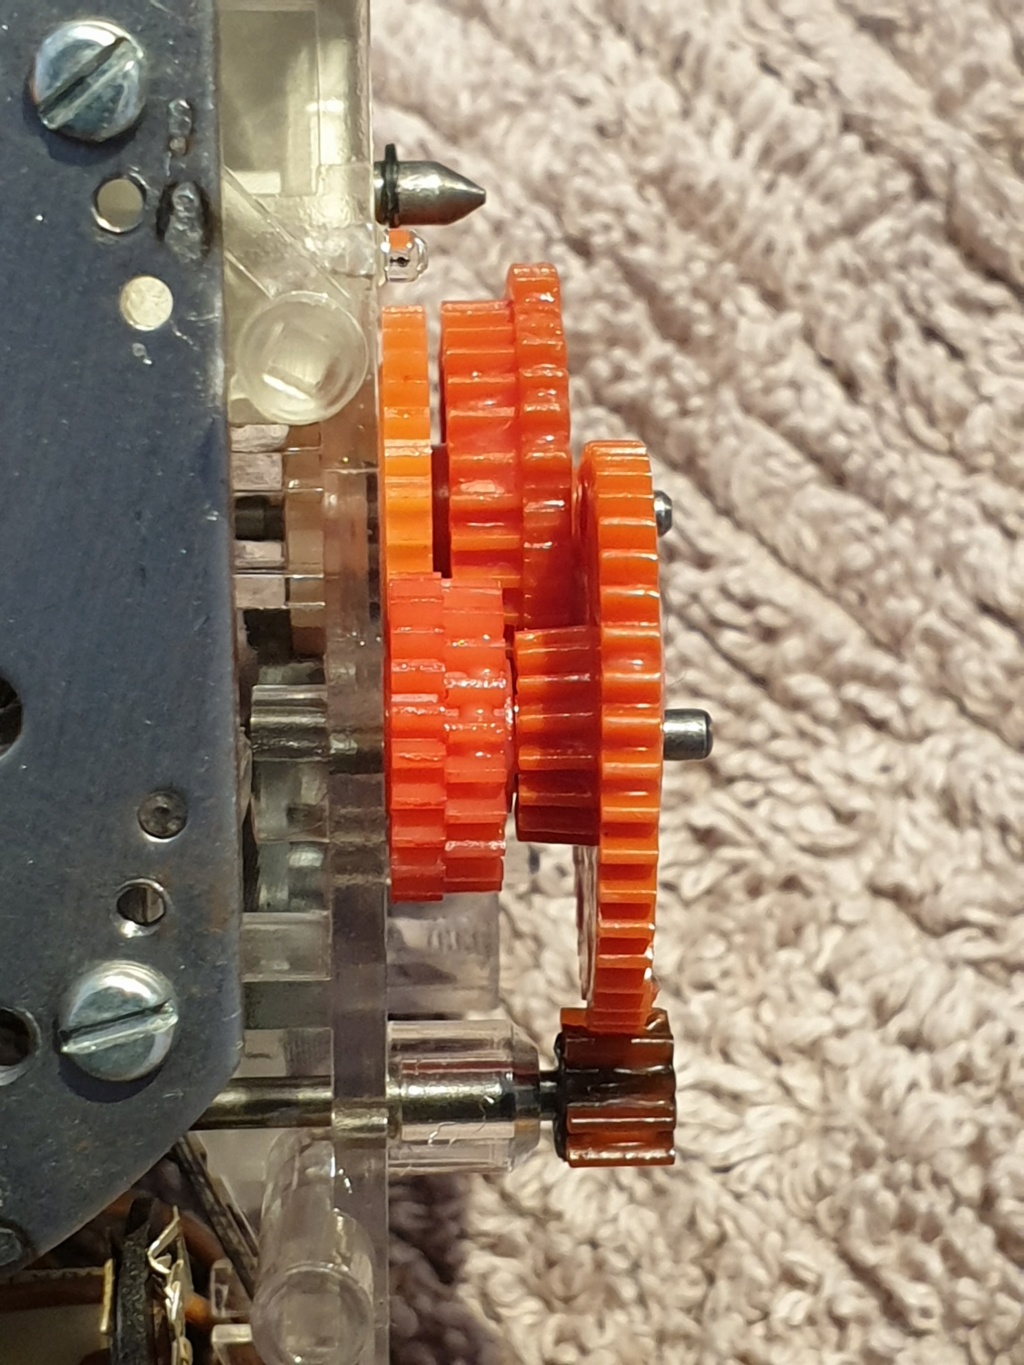
I won’t delve into removing the speedo pod & Odometer as that’s already been covered elsewhere on the forum.  We start with the following scenario, all too common so I’ve read...

Rebuilding a K Odometer using inexpensive eB*y gears- a (rough) guide  15dc8410

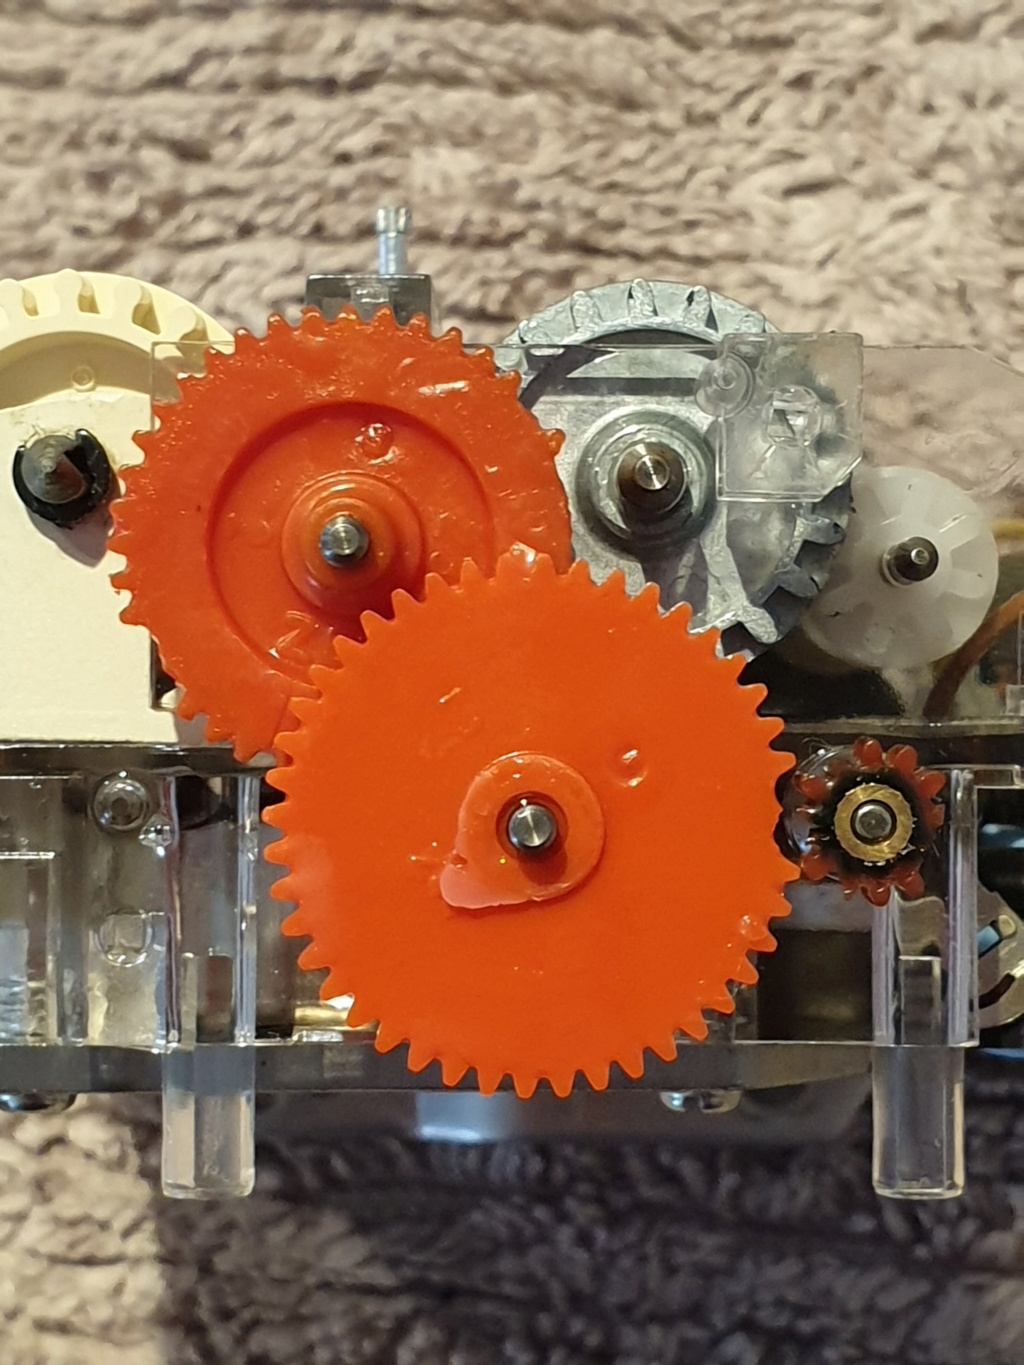
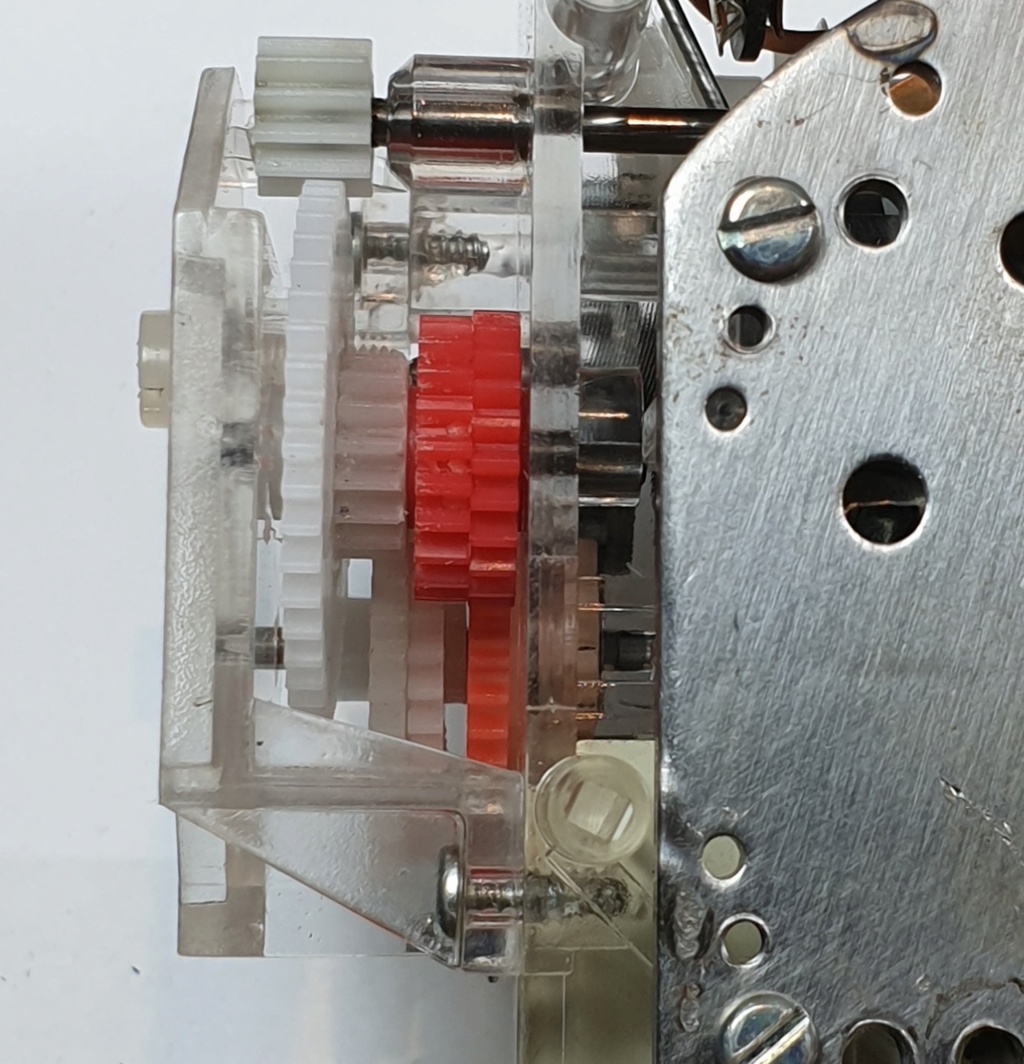
In my case the 12t driving gear was stripped along with the 34/40t & 16/44t. The 11/33t & 22/23t gearsets in this instance were ok, possibly due to not being contaminated with the lube that kills the OEM gears. 

Rebuilding a K Odometer using inexpensive eB*y gears- a (rough) guide  E9730610

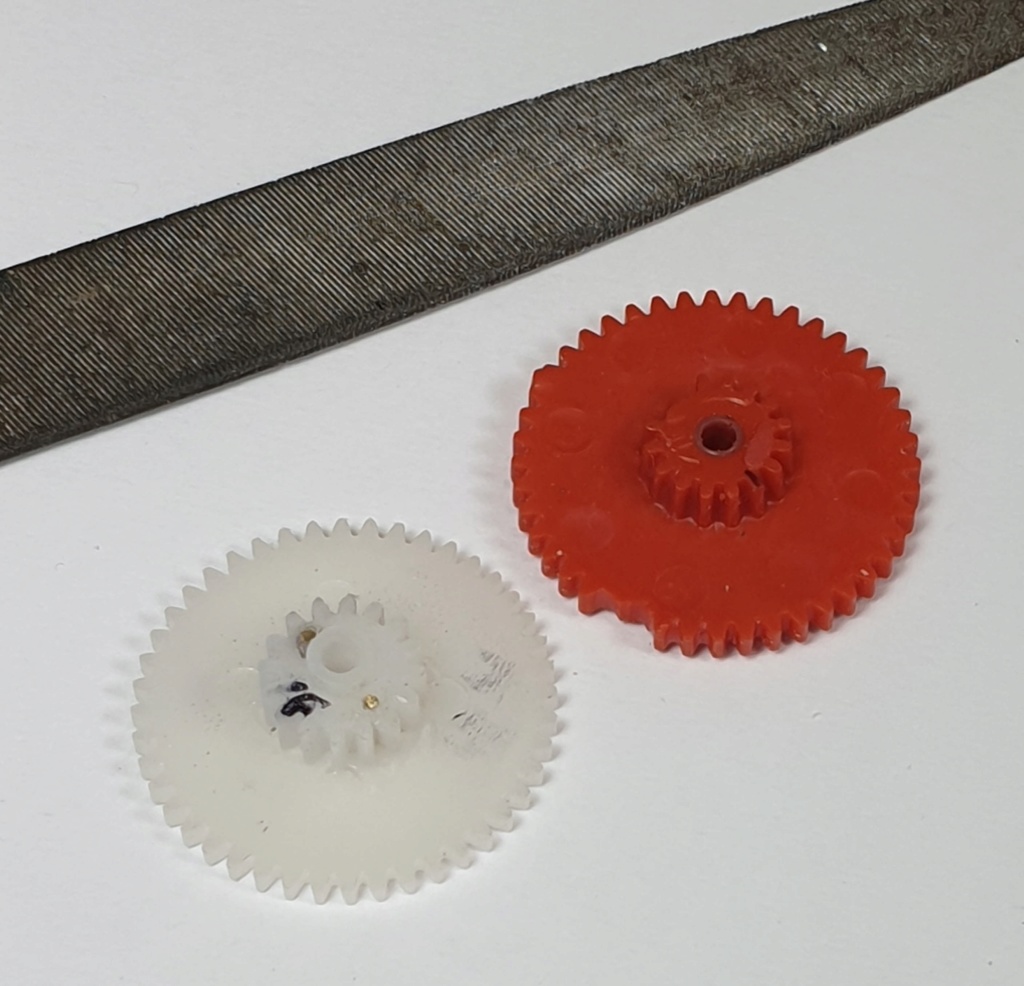
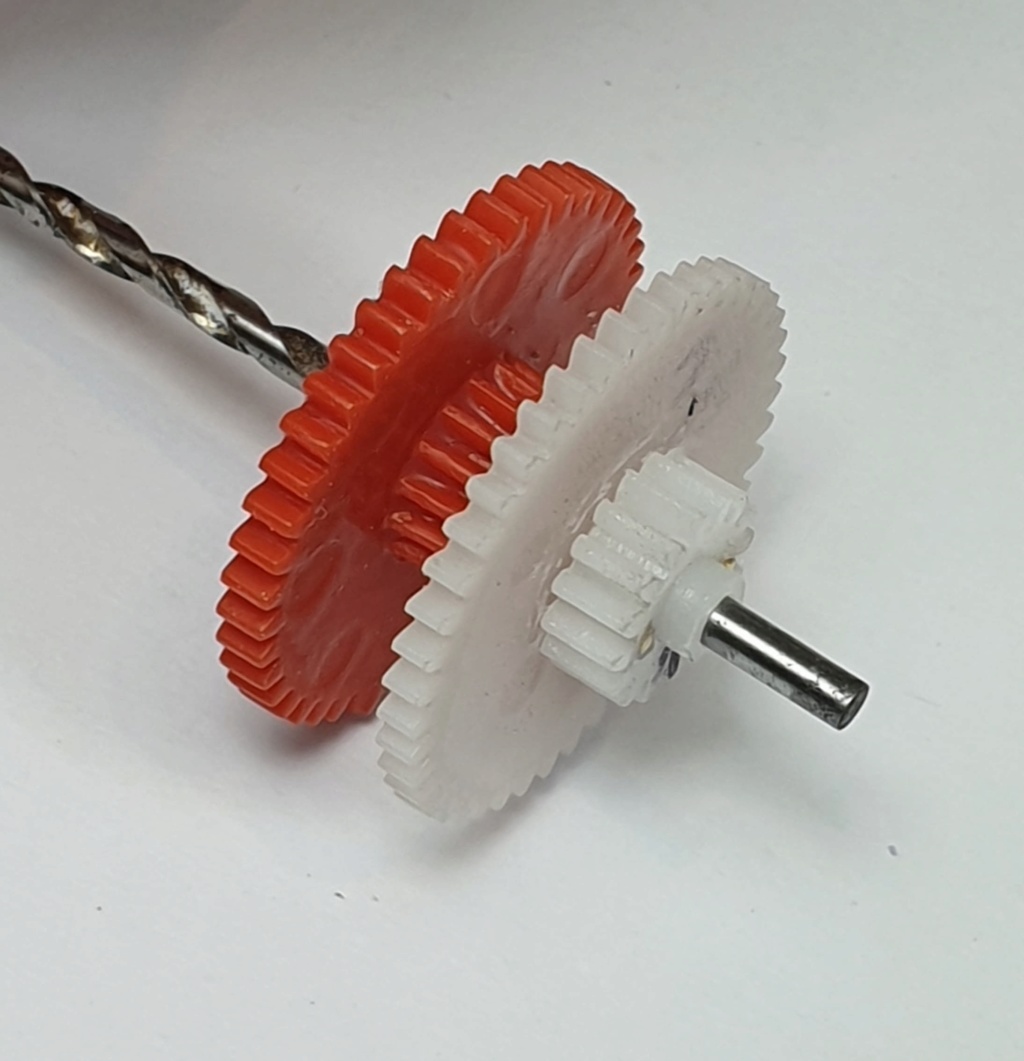
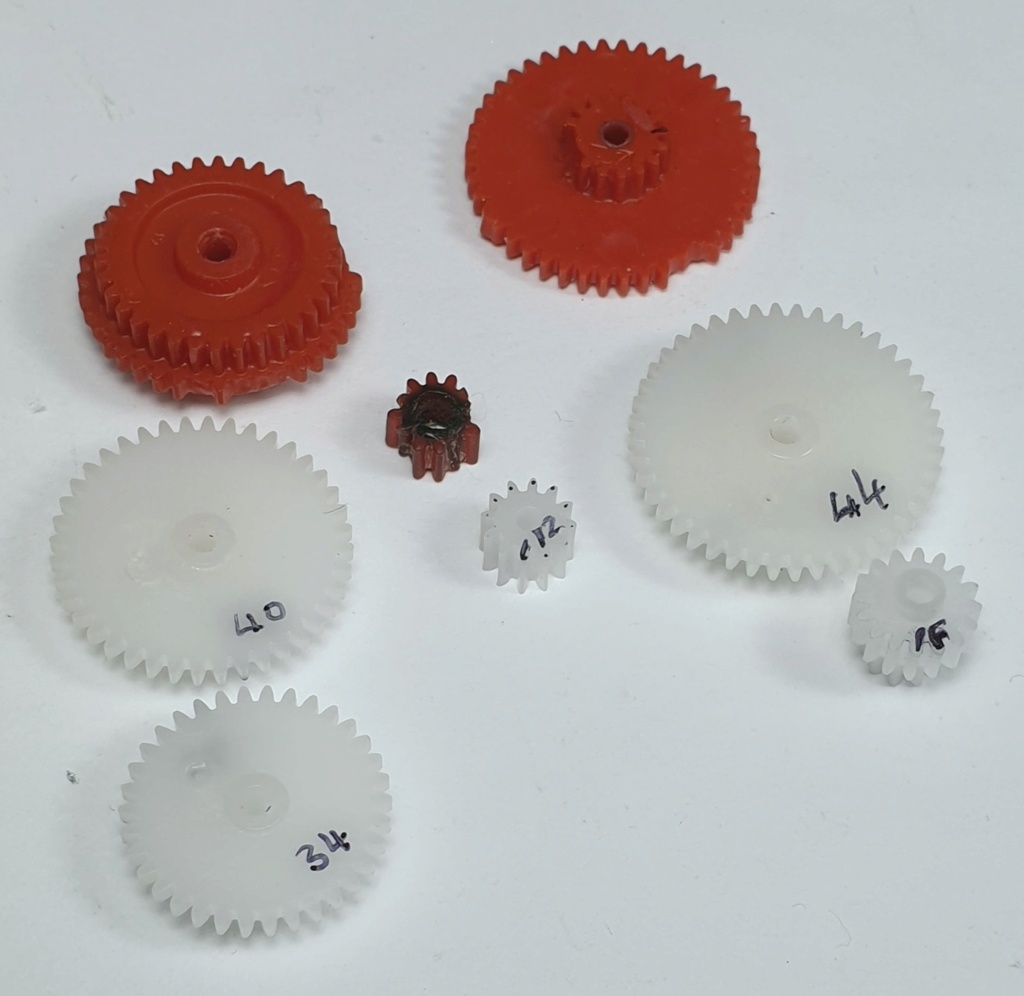
So, out of the packet of generic nylon-type cheapy gears the correctly toothed gearsets were selected. As it’s near impossible to source the double sided gears we’ll be joining two single sided gears. As this is an Oz-based K, the tooth count will be obviously different for Euro & U.S Odometers. 

Rebuilding a K Odometer using inexpensive eB*y gears- a (rough) guide  81fe7710


Last edited by StandardK on Sat Jun 13, 2020 4:50 pm; edited 2 times in total


StandardK

StandardK
Gold member
Gold member
After filing both gears on one side to obtain a perfect mating surface Loctite super glue was applied to join the two gears together, while being mounted on a suitable drill bit (same size as the odometer gear axles) to ensure alignment. The 12t driving gear’s centre in my case needed to be drilled, as the OEM gear fell to bits while being removed, leaving the mounting collar on the axle behind. The driving gear HAS to be mounted firmly to the collar/axle, as it does, well, the driving. A blob of super glue after being pressed on sorts that out.

Are the gears a bit tight in the axles? No biggy, just gently drill the gears to suit the axles as needed (they should be able to turn freely, but not wobbly)

After the glue has set, two small holes will be drilled to accept brass rod to permanently “pin” the two gears together. The glue may well hold by itself, but I wouldn’t rely on it alone. 

Rebuilding a K Odometer using inexpensive eB*y gears- a (rough) guide  9e9b5710

The holes are drilled at slow speed using a cordless drill and .65mm drill bit. The brass rod is slightly larger at approx .68mm to ensure a tight fit. 

Rebuilding a K Odometer using inexpensive eB*y gears- a (rough) guide  B5229710

After the rod is passed through a dab of super glue is applied & the rod withdrawn. The rod is snipped off using a small set of sidecutters. 

Rebuilding a K Odometer using inexpensive eB*y gears- a (rough) guide  69f7c610


Last edited by StandardK on Sat Jun 13, 2020 4:57 pm; edited 5 times in total


StandardK

StandardK
Gold member
Gold member
After snipping the brass rod & filing the remainder we now have a match for the OEM double gear! 

Rebuilding a K Odometer using inexpensive eB*y gears- a (rough) guide  4f9e7810

Close enough....

Rebuilding a K Odometer using inexpensive eB*y gears- a (rough) guide  2e390010


StandardK

StandardK
Gold member
Gold member
After completing one gearset at a time it’s time to ensure they mesh correctly with the remaining OEM gears, and roughly match the original gearset width. You may have to file or cut some of the plastic gears either side of the center to roughly match the original gear width profiles, as you may not find an exact fit. It’s no big task. 

Rebuilding a K Odometer using inexpensive eB*y gears- a (rough) guide  60179c10

Hey, it all works! 

Rebuilding a K Odometer using inexpensive eB*y gears- a (rough) guide  86023f10

The plastic gear cover back on. Ensure there is clearance between the gears and this cover before screwing it down hard. 

Rebuilding a K Odometer using inexpensive eB*y gears- a (rough) guide  D83a3c10

As previously stated, there are no guarantees as to how long the cheapy gears will last, however as they aren’t turning at warp speed one would hope it’s a while....100KM later & still turnin’ at this end.  cheers

One last tip, the phone camera is your friend! Take pictures before, during & after! 

Hope this helps someone. 

Regards

Dan


MartinW

MartinW
Life time member
Life time member
Good job Dan and a good write up. As a matter of interest an industrial chemist checked out the composition of the gears and stated that the plastic used contained PTFE.
Regards Martin.


__________________________________________________
1992 K75s
    

Dai

Dai
Life time member
Life time member
Nice one Dan!


__________________________________________________
1983 K100 naked upgraded to K100LT spec after spending time as an RS and an RT
1987 K100RT
Others...
1978 Moto Guzzi 850-T3, 1979 Moto Guzzi 850-T3 California,1993 Moto Guzzi 1100ie California
2020 Royal Enfield Bullet 500
    

brickrider2

brickrider2
Life time member
Life time member
"...contaminated with the lube that kills the OEM gears."


Can someone elaborate on this statement?  What lube? OEM? Aftermarket lube applied later?
Should the plastic gears ever need lube of any kind? 


__________________________________________________
1996 K1100LT
    

Point-Seven-five

Point-Seven-five
Life time member
Life time member
Nylon and Delrin plastic gears are considered to be self lubricating.  You can put a lubricant on them, but it will only attract dirt which will cause the teeth to wear.

I suspect the extra sharp cheddar cheese OEM gears in the odometer were originally designed to thwart attempts at tampering with odometer readings.  There was absolutely no other reason to use that garbage plastic in the 1980's when there were far superior resins available for a couple pennies per gear.


__________________________________________________
Present: 1991 K100RS "Moby Brick Too"
 
Past:
1994 K75RT "Ilsa, She Wolf of the SS"
1988 K100RS SE "Special Ed"
1994 K75S "Cheetos"
1992 K100RS "Moby Brick" R.I.P.
1982 Honda FT500
1979 Honda XR185
1977 Honda XL125
1974 Honda XL125
1972 OSSA Pioneer 250
1968 Kawasaki 175
    

Laitch

Laitch
Life time member
Life time member
odometergears.com's take on the cheesiness can be found in point #9 of its FAQs.


Last edited by Laitch on Tue Mar 22, 2022 10:54 am; edited 2 times in total


__________________________________________________
1995 K75 90,000 miles
    

brickrider2

brickrider2
Life time member
Life time member
It sounds as though dismantling the instrument and cleaning the petroleum lube could save the mechanism.


__________________________________________________
1996 K1100LT
    

StandardK

StandardK
Gold member
Gold member
brickrider2 wrote:It sounds as though dismantling the instrument and cleaning the petroleum lube could save the mechanism.
Far too late for that in a lot of cases I believe brickrider. But hey, if you find an intact one it might be worth a try. As stated my OEM inner gears were ok, I suspect as they were bone dry they escaped the mad lubricator’s clutches. 

Regards

Dan


Sponsored content


View previous topic View next topic Back to top  Message [Page 1 of 1]

Permissions in this forum:
You cannot reply to topics in this forum